Creating Your First Quiz with QuizWhiz
This guide will walk you through the process of creating your first quiz using QuizWhiz. We'll cover everything from uploading your source material to customizing your quiz settings.
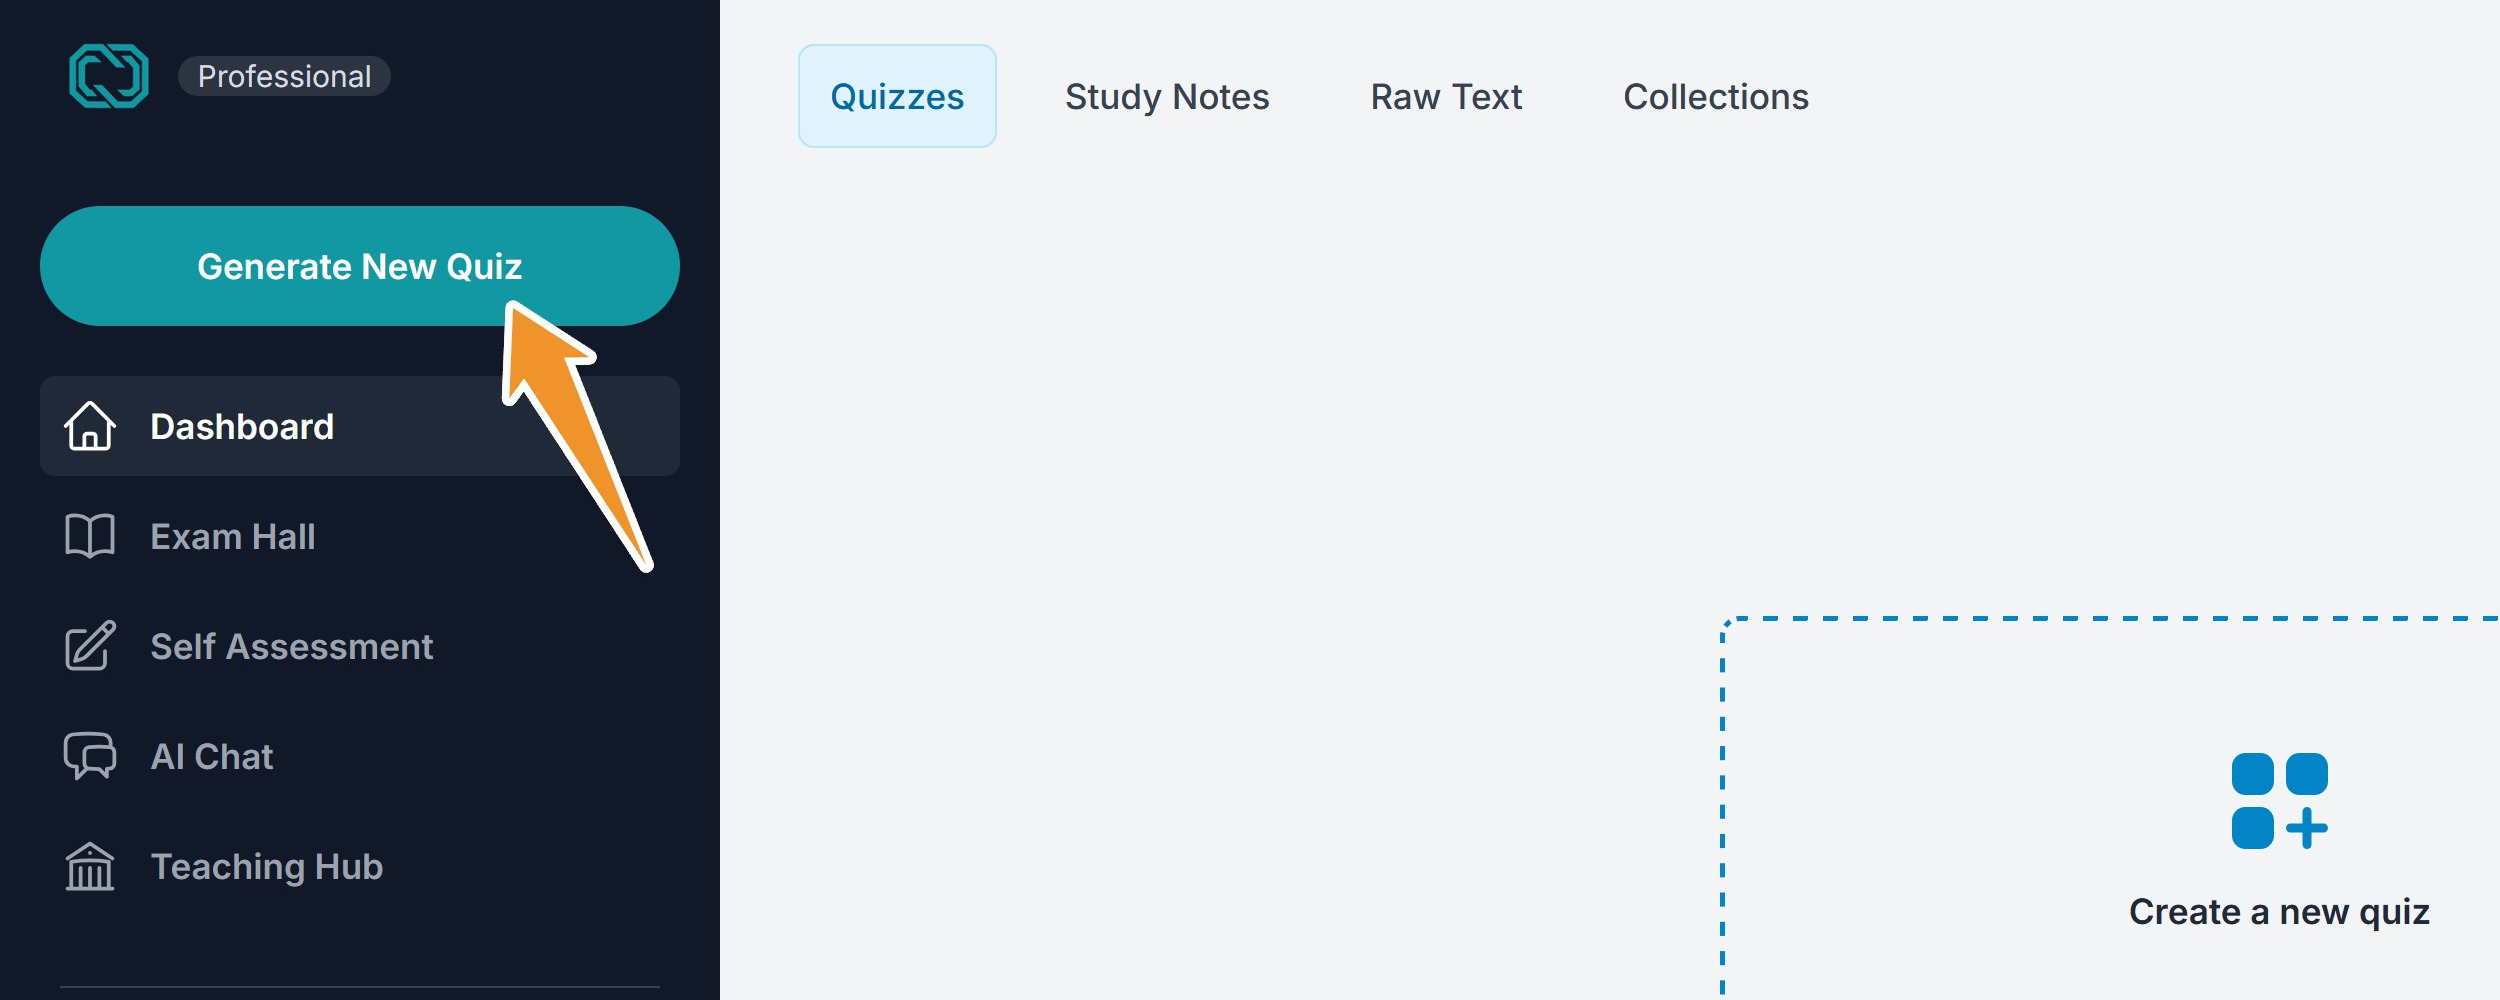
Step 1: Log In and Navigate to the Quiz Creation Page
- Log in to your QuizWhiz account.
- Click the "Create Quiz" button (or the equivalent button/link in your interface). This will take you to the quiz creation page.
Step 2: Choose Your Input Method
QuizWhiz allows you to create quizzes from a variety of sources:
- Raw Text: New or From Saved
- Study Notes: New or From Saved
- Collection: From Saved
Raw Texts
- Text: Paste in text from your notes, a document, or a website.
- PDF: Upload a PDF document.
- Image: Scans of documents. Extract text using AI.
- URL: Enter the URL of a webpage.
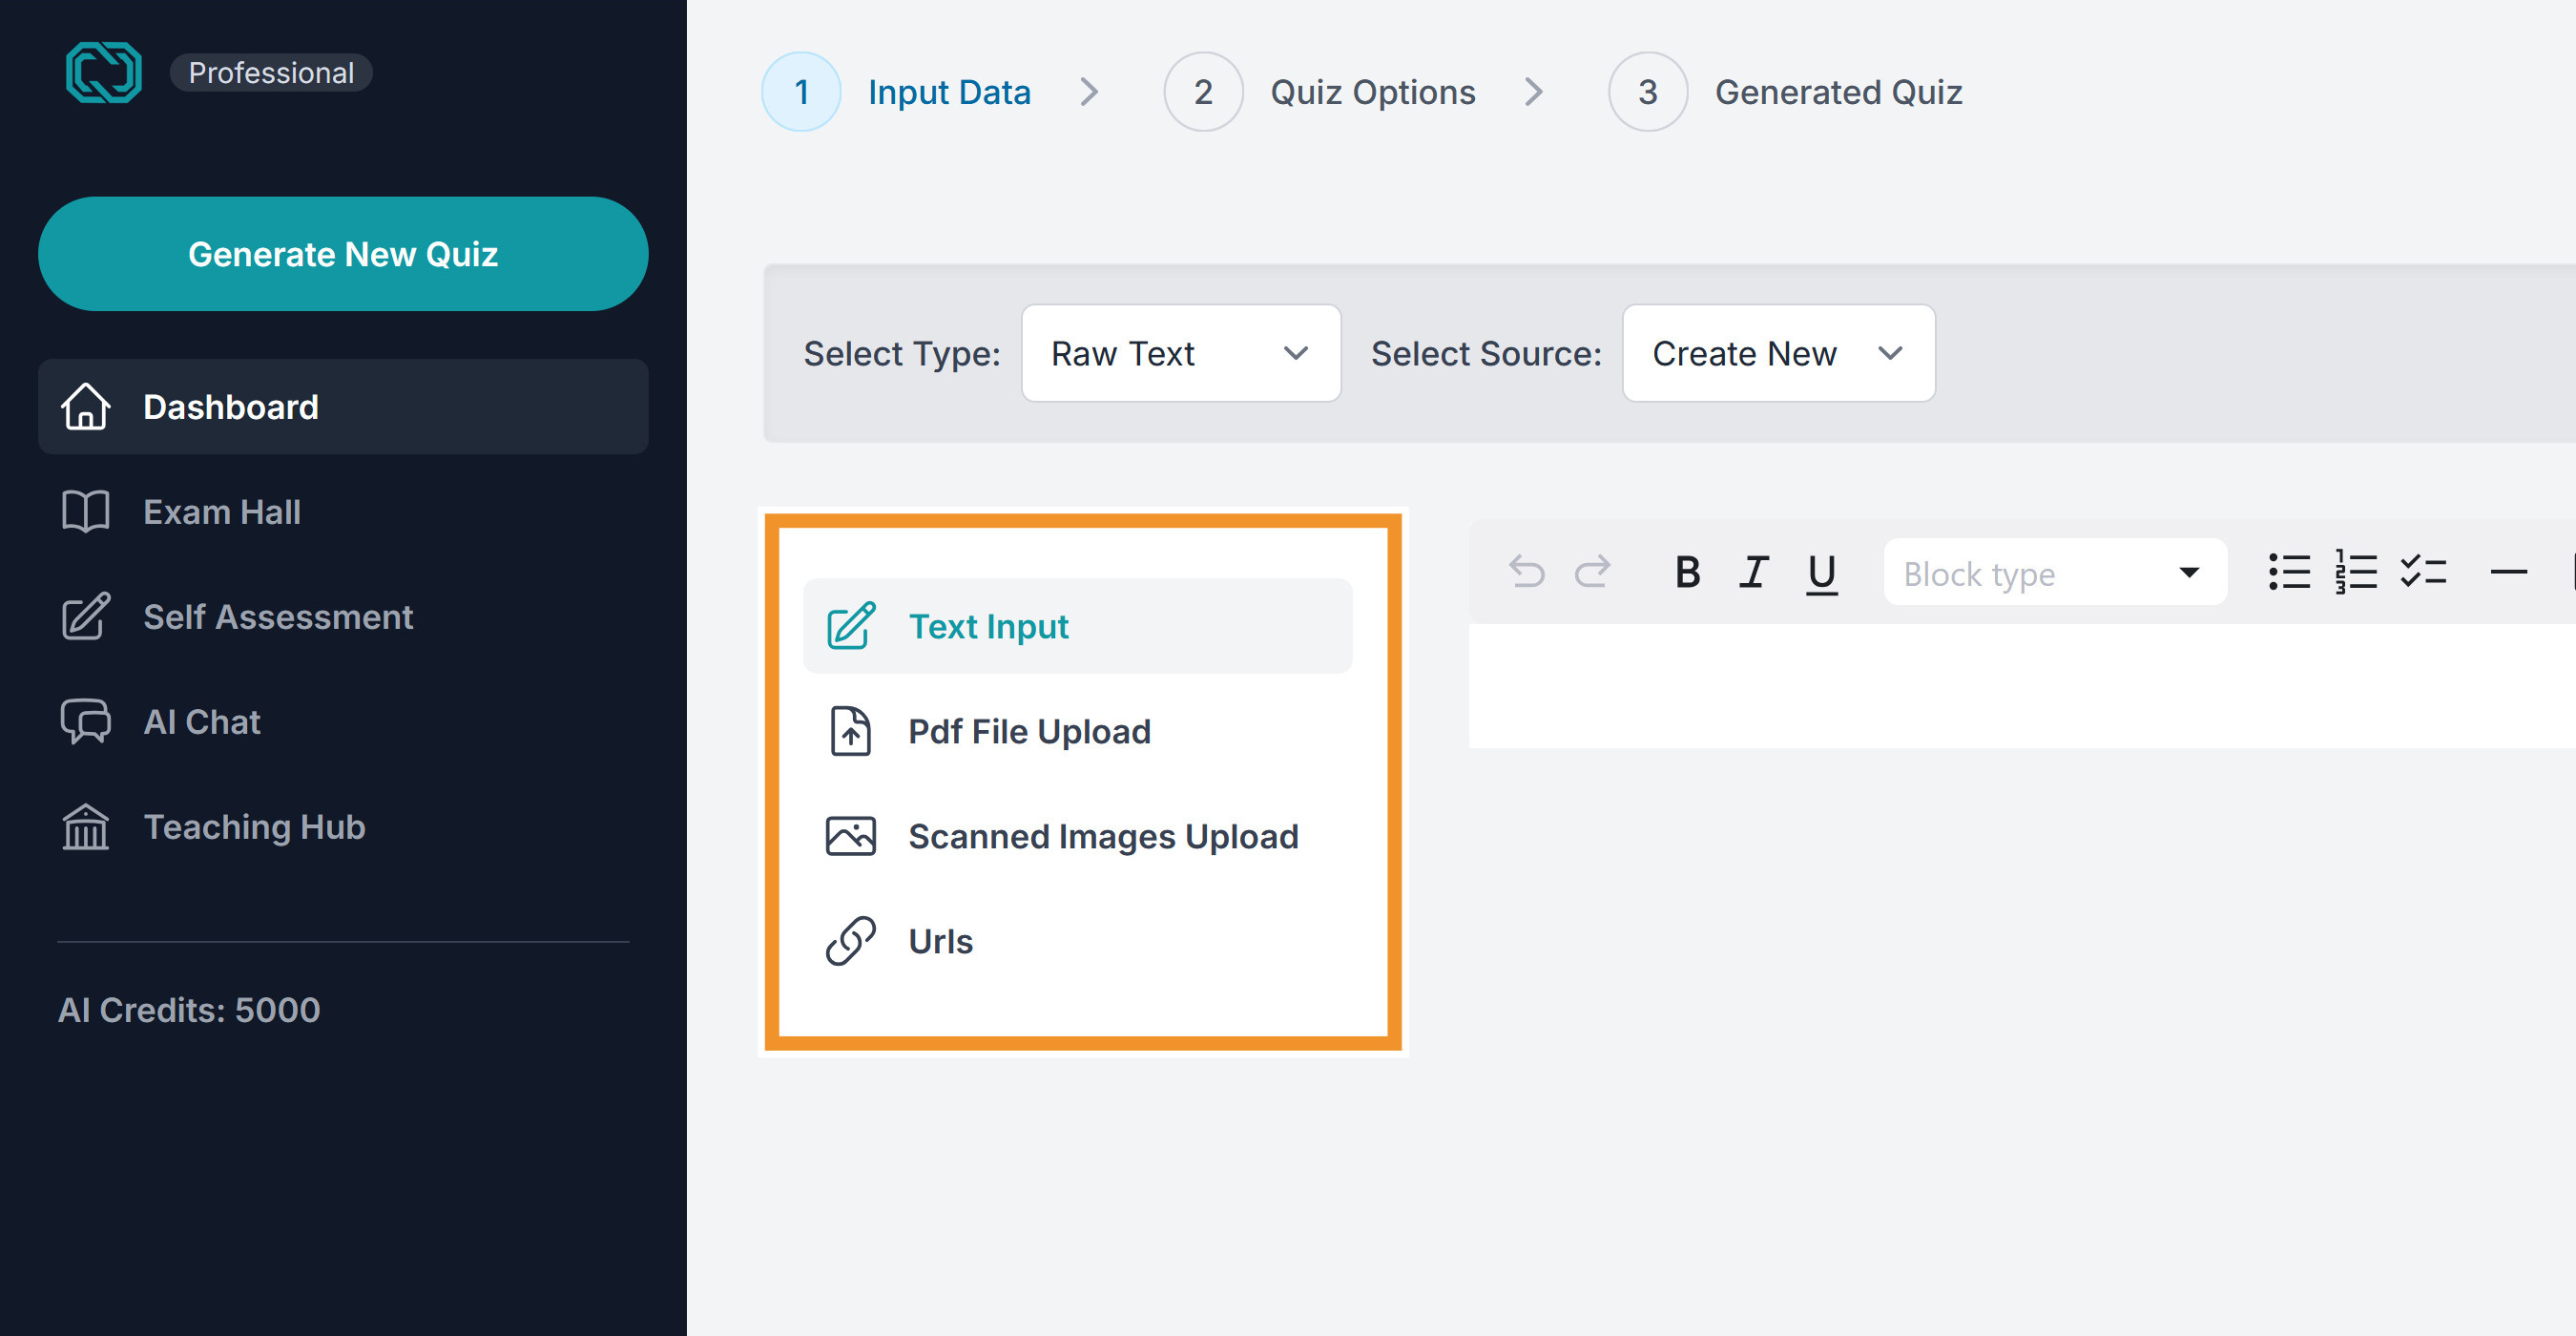 Image shows the Raw Text input type
Study Notes
Study Notes are summaries of topics or text.
There are 3 ways to create Study Notes:
- Choose from our library using Subject/Grade/Board.
- Generate from a Raw Text
- Generate from a Topic.
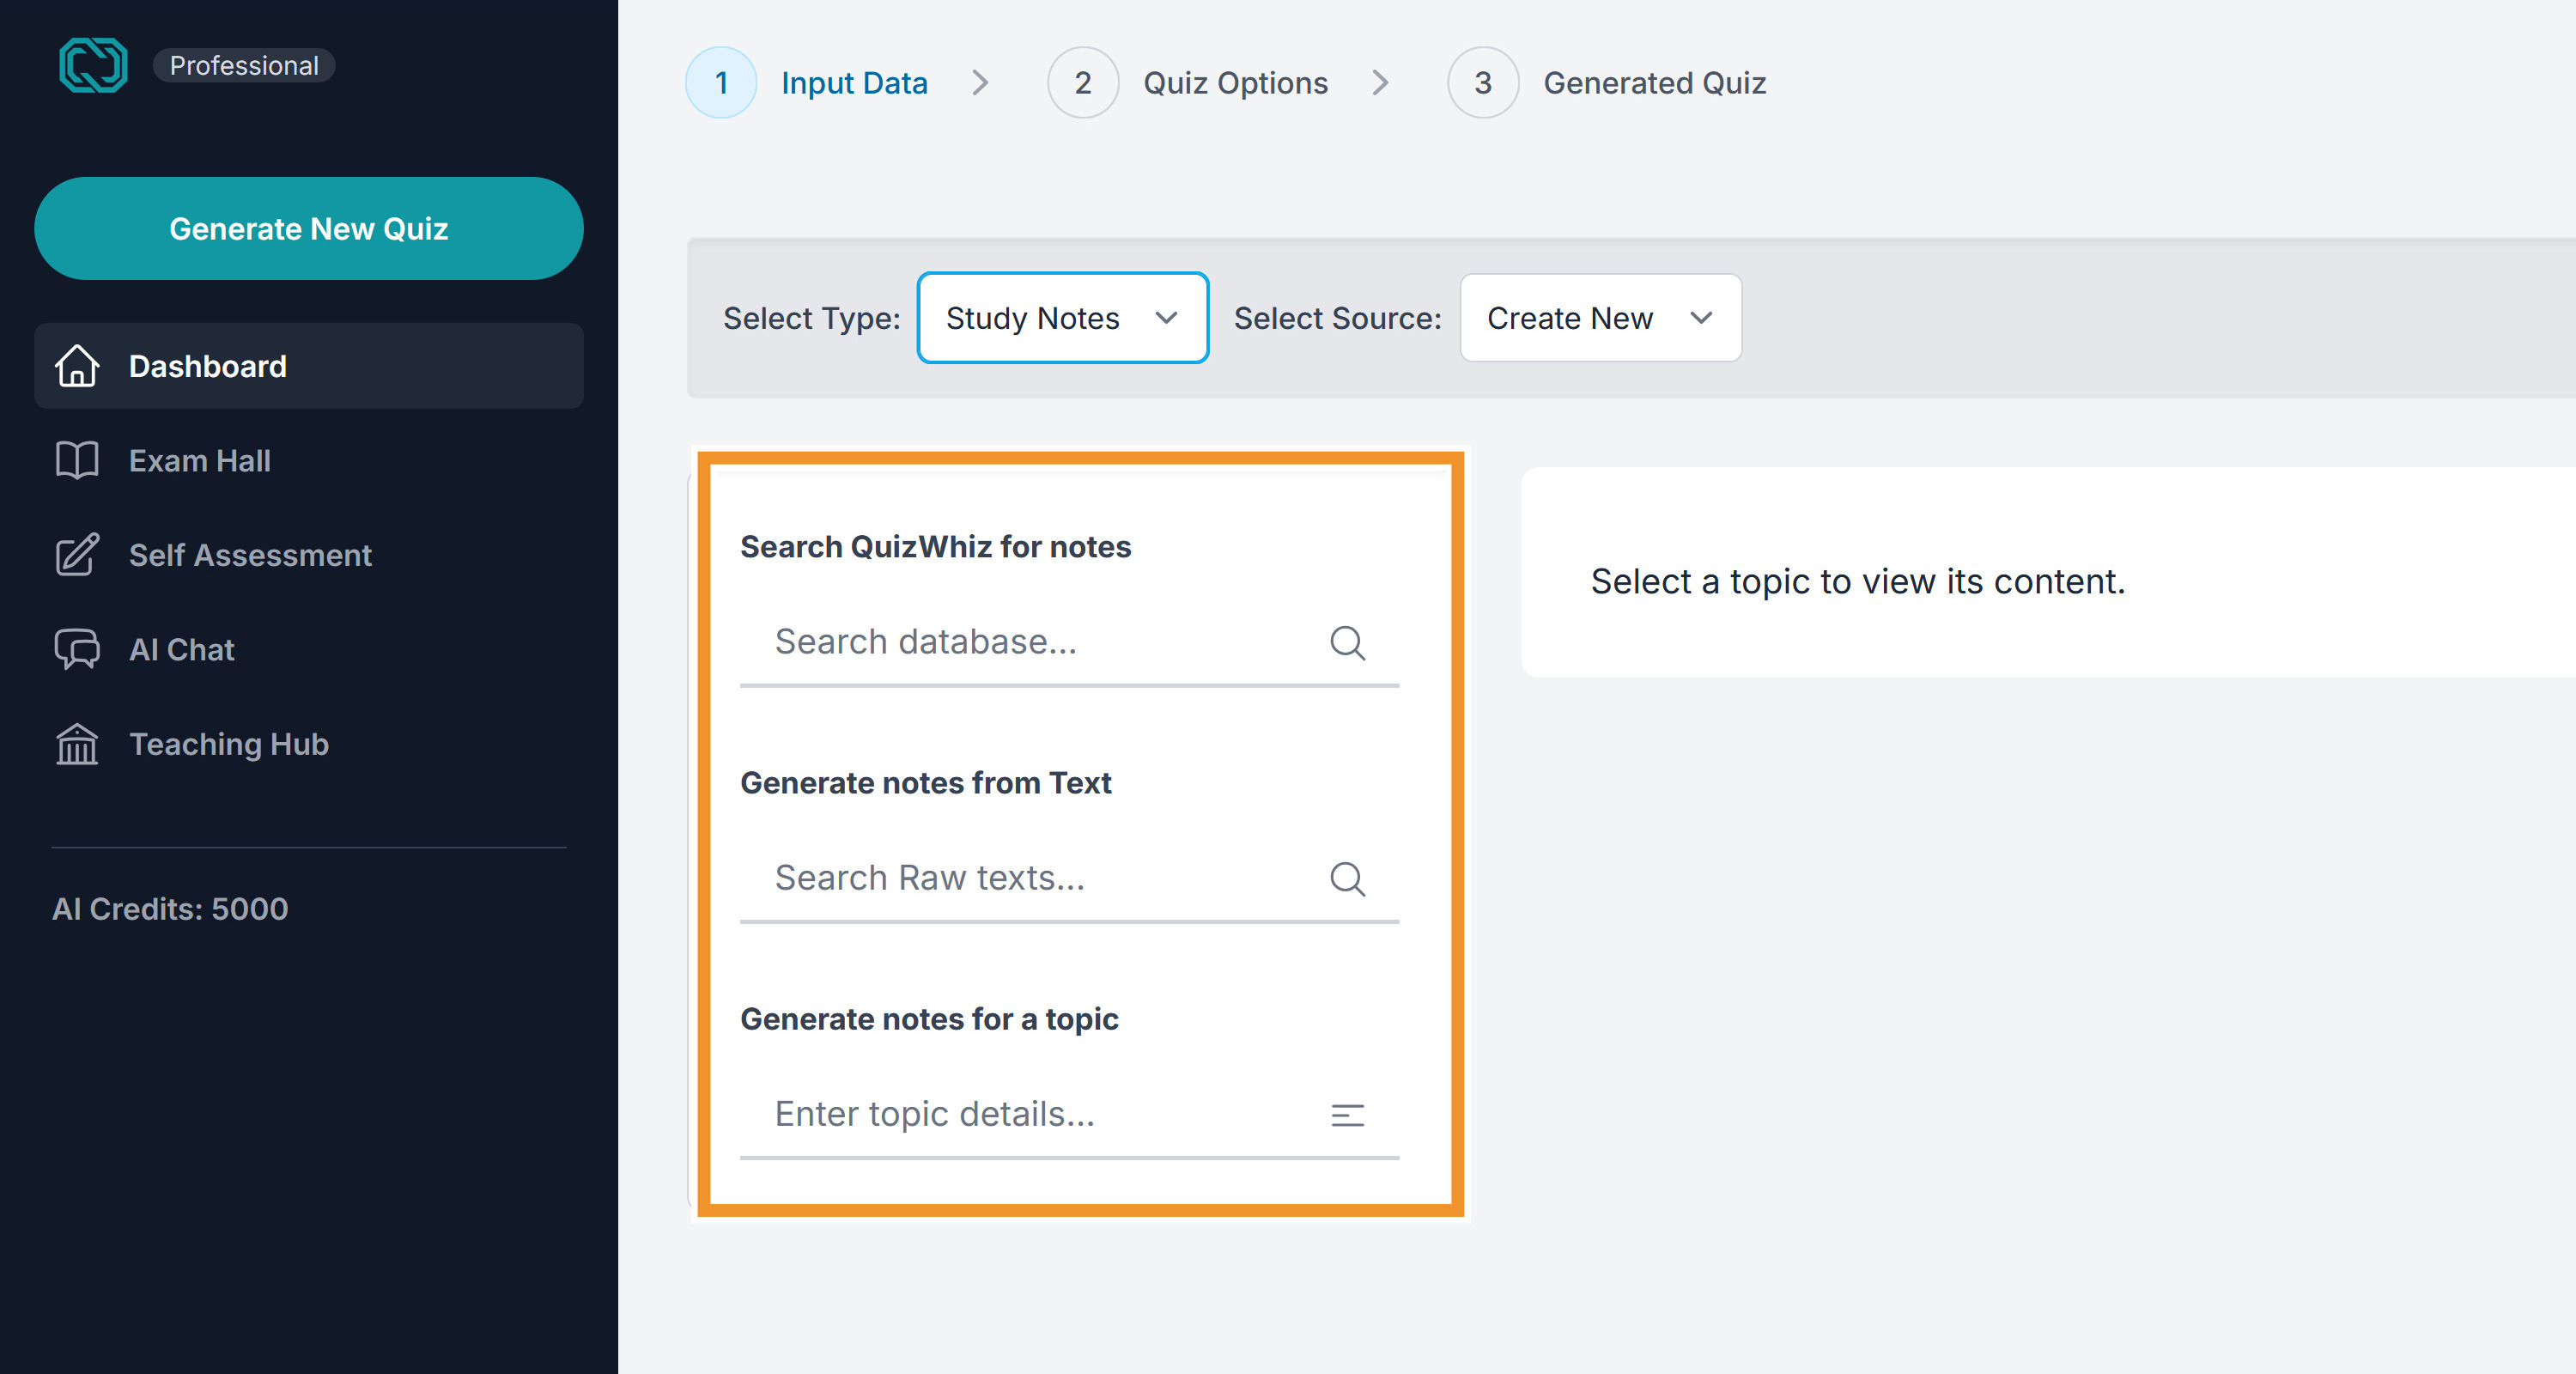 Image shows the Study Notes input type
Once a Study Note is generated, you can use it to generate the quiz.
What does "From Saved" mean?
QuizWhiz allows you to enter/create Raw Texts or Study Notes while you are creating your quiz. And it allows you to create them before hand so that you can use them in the future for one more more quizzes.
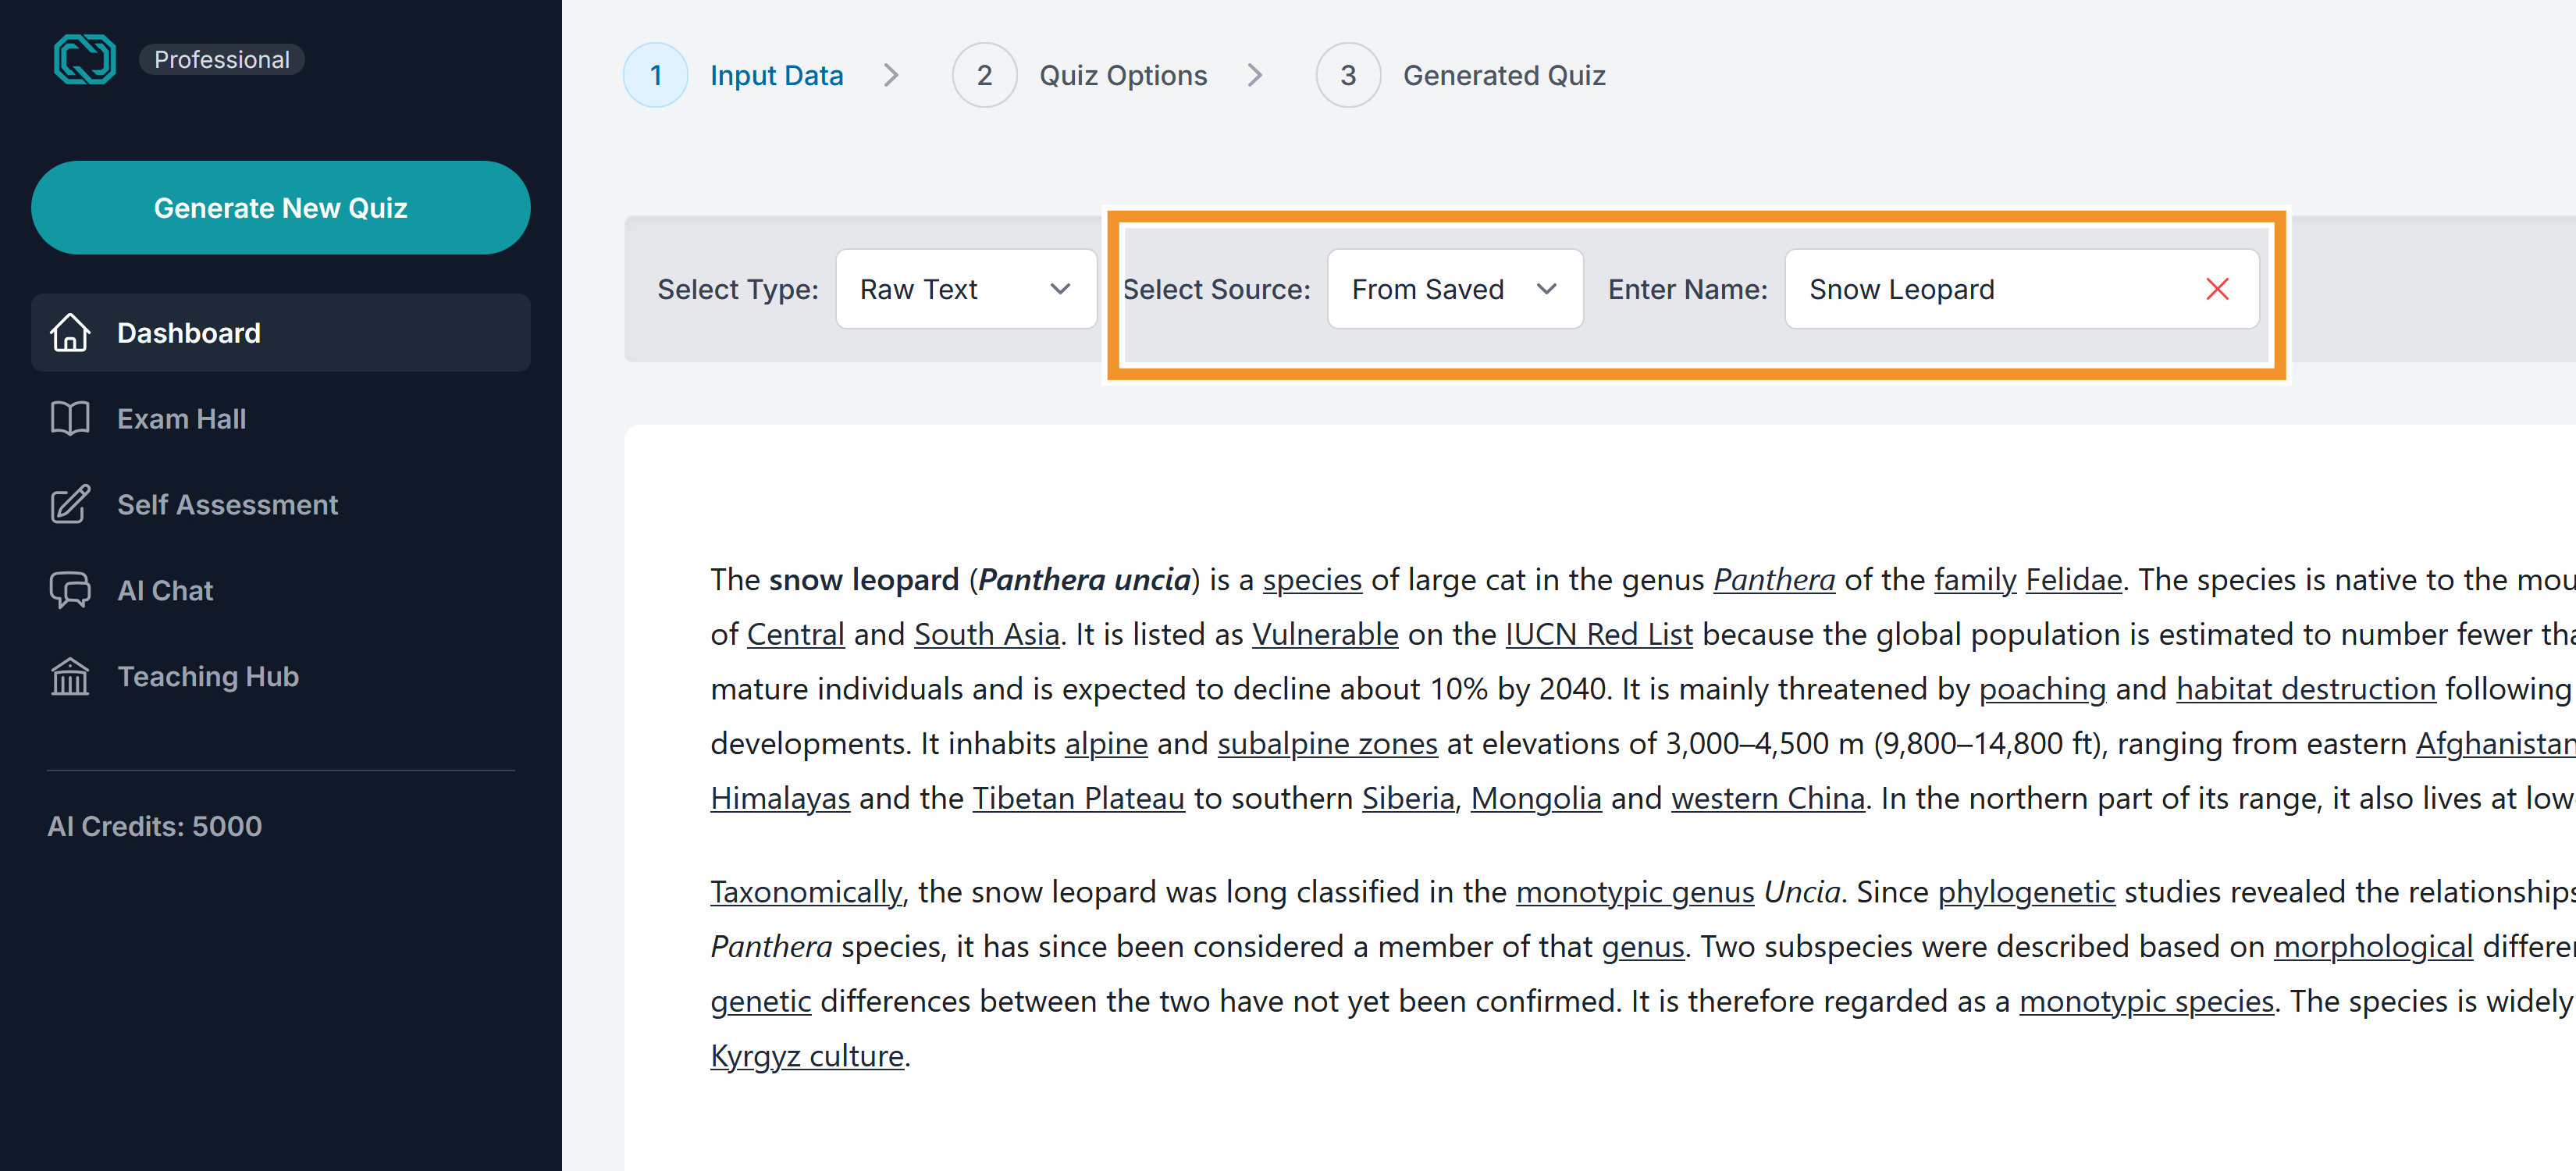 Shows a Raw Text that is imported using the "From Saved" option
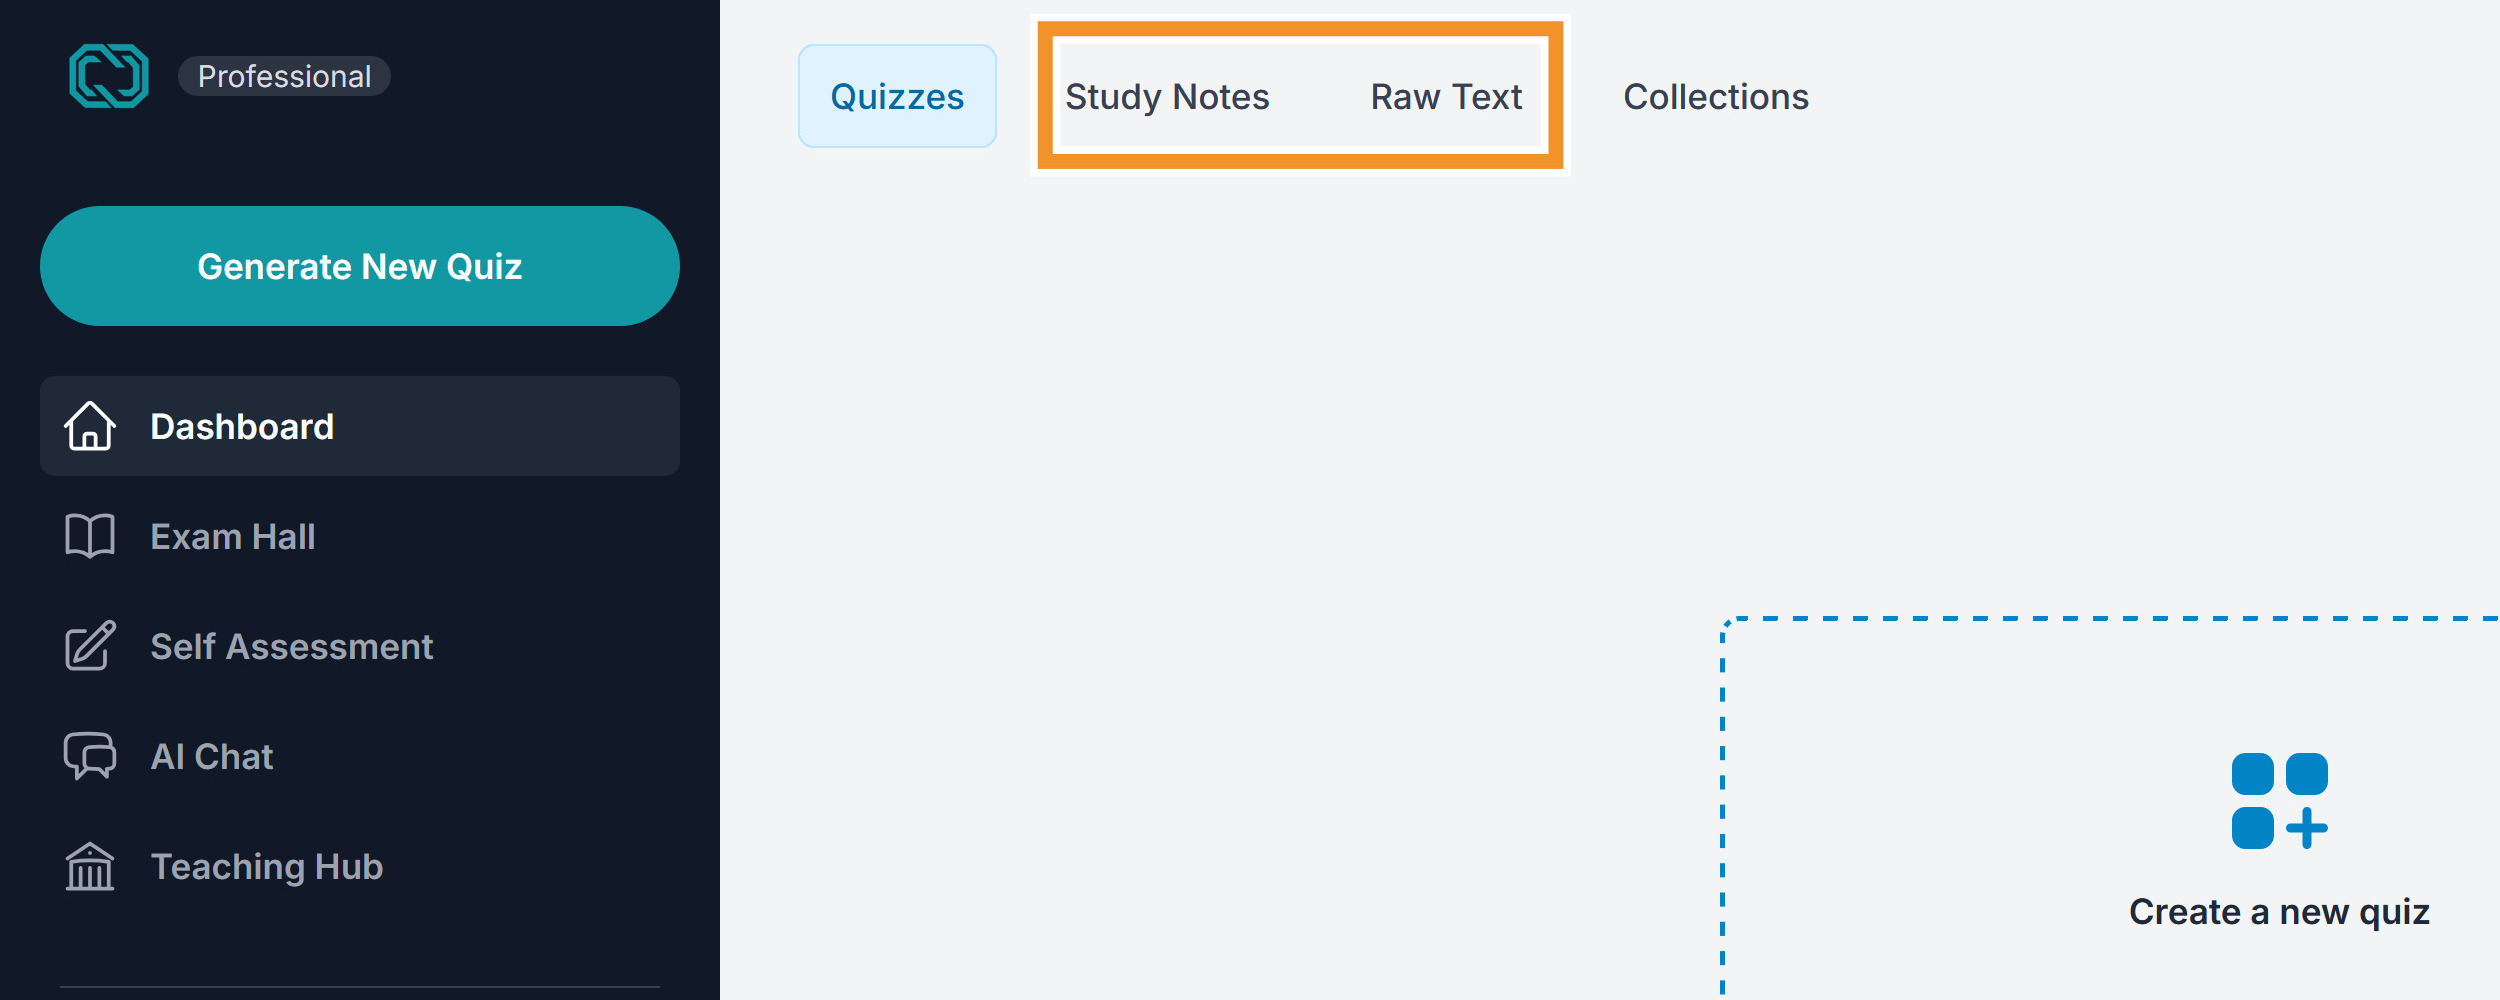
You can create Raw Text and Study Notes by going to Dashboard and clicking on one of the tabs:
You can also create collections of multiple Raw Texts and Study Notes, and use a collection to create a quiz.
Important Notes about Input:
- Text Quality: The quality of the generated quiz depends on the quality of your input text. Clear, well-written text will produce the best results.
- PDF/Document Formatting: Complex formatting (tables, columns, images) in PDF or Word documents may not be perfectly interpreted by the AI. Simpler formatting works best.
- URL Content: The AI will extract the main text content from the webpage. It may not include all elements (e.g., sidebars, navigation menus).
- Make sure to edit the extracted or scraped text before using it for quiz generation
- You can use multiple input sources for a single quiz.
Step 3: Customize Your Quiz Options and Generate Quiz
Quiz Options
This is where you control the type, number, and difficulty of the questions generated.
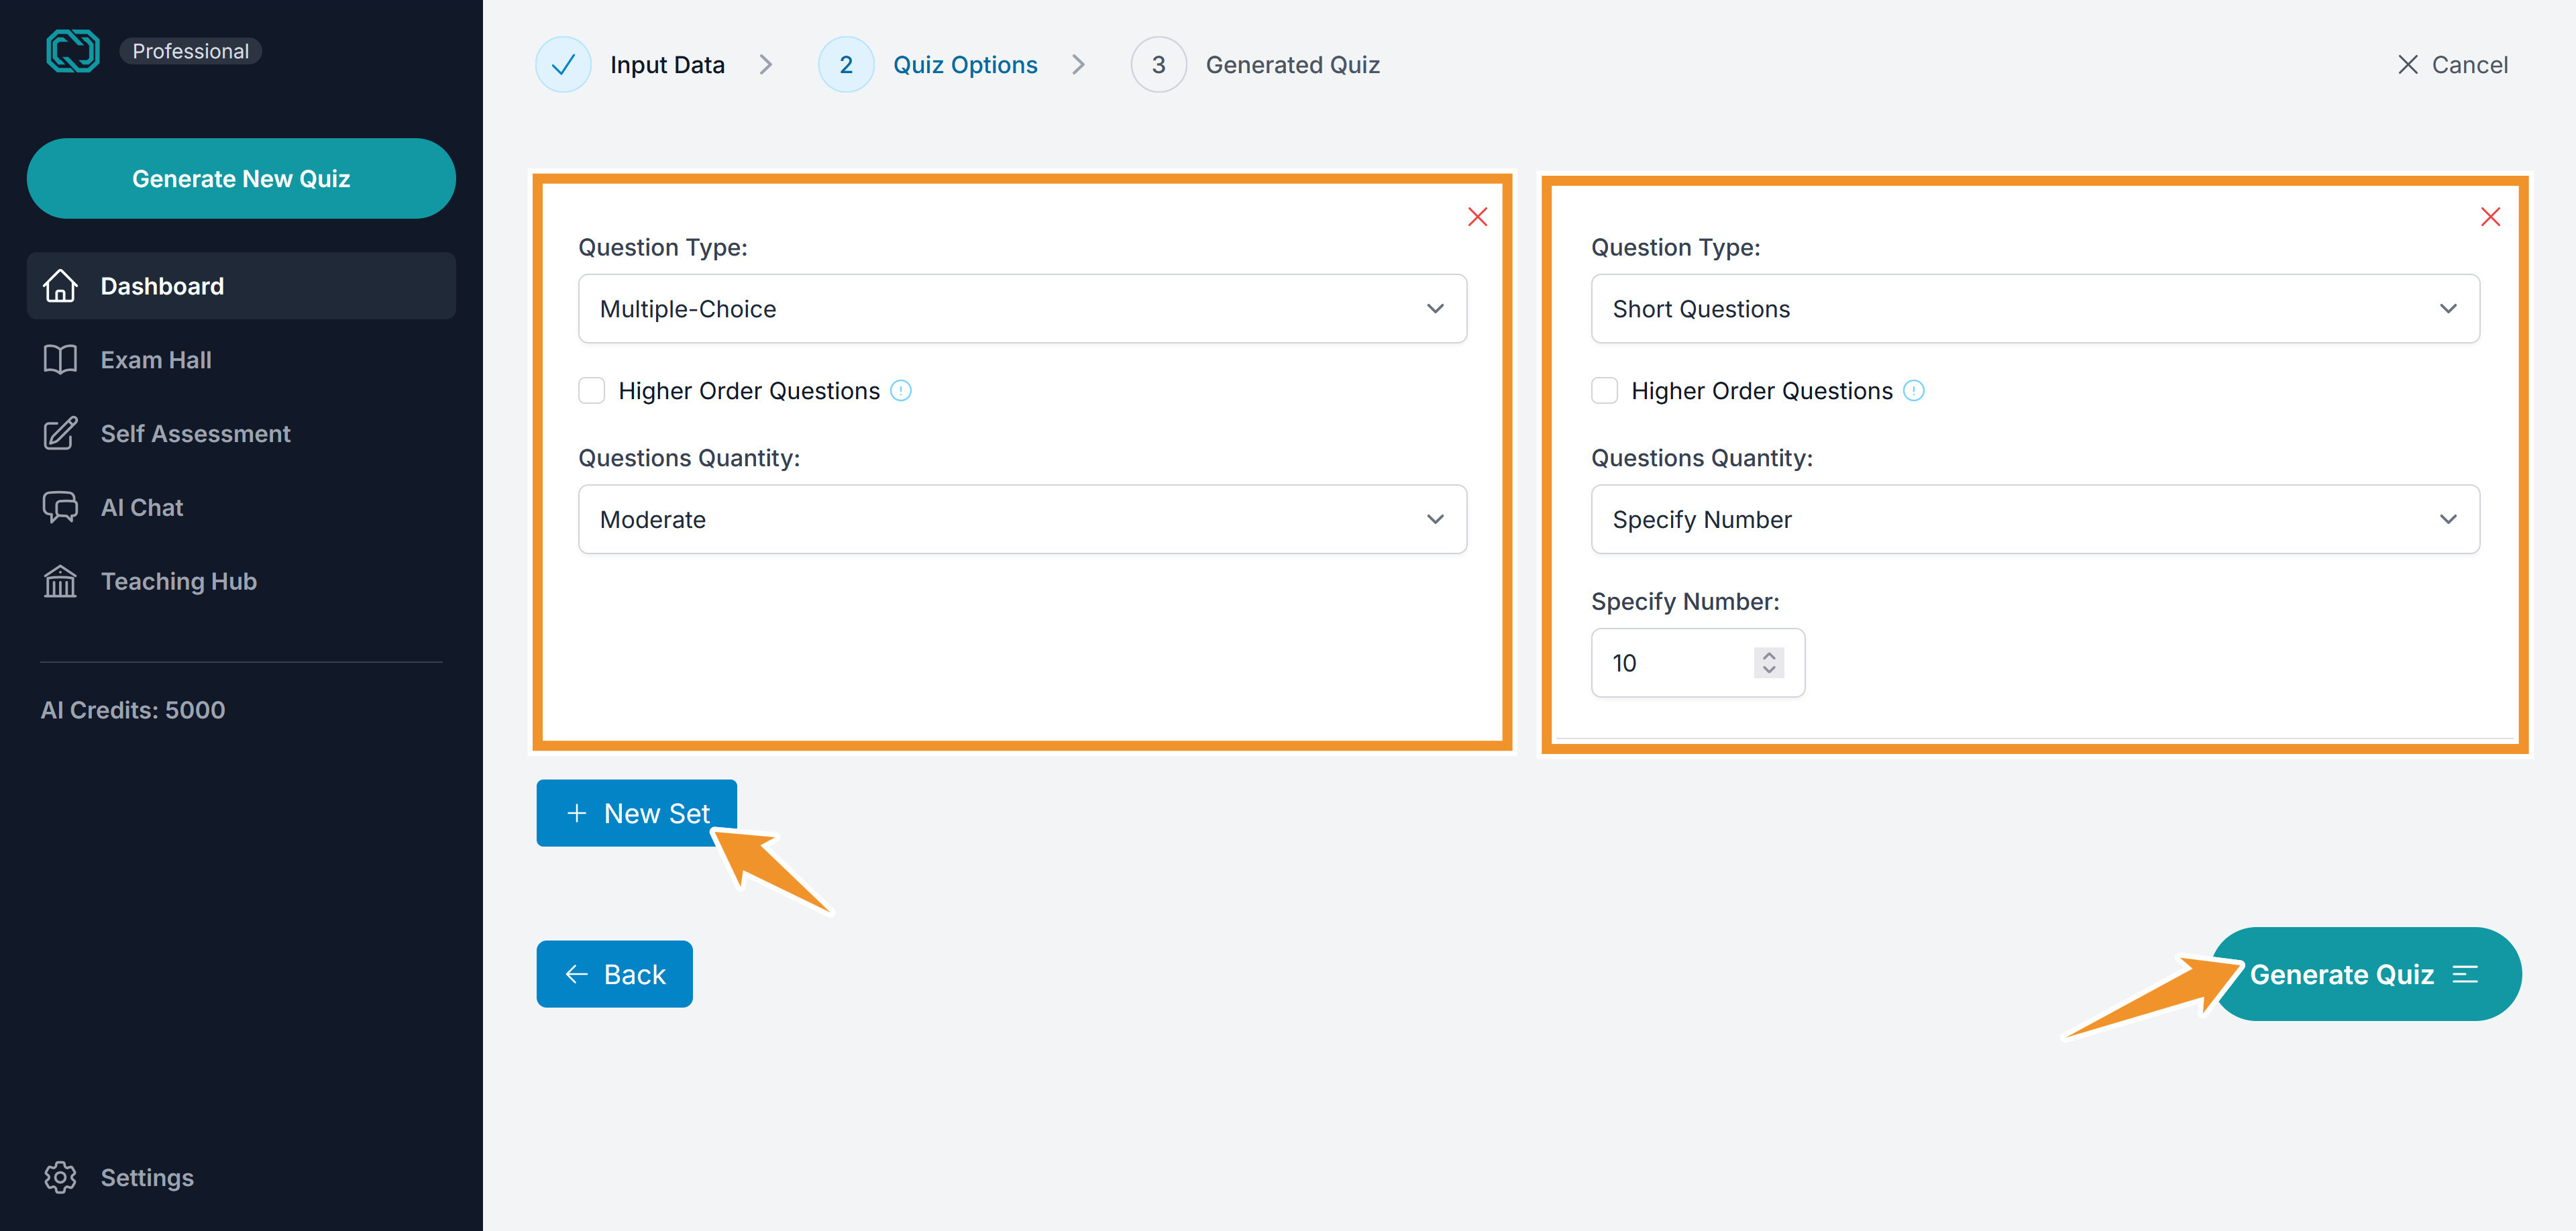
The image shows 2 questions sets: One of MCQs of Moderate quantity and the other of Short Questions of 10 quantity. It also highlights the button to add New sets and the button to generate the quiz
-
Question Types: Select the types of questions you want to include:
- Multiple Choice: Questions with several answer options, only one of which is correct.
- True/False: Statements that students must identify as true or false.
- Short Answer: Questions that require a brief written answer.
- Fill-in-the-Blanks: Sentences with missing words that students must fill in.
- Multi-part/Scenario-based: Questions with a scenario and multiple short answer questions.
- You can also request to have Higher Order Questions, for more challenging questions.
-
Number of Questions:
- Specific Number: Enter the exact number of questions you want to generate.
- Presets: Use the "Fewer," "Moderate," or "More" options for quick selection.
-
You can create multiple question sets in a single quiz.
Generate Quiz
Once you've configured your settings, click the "Generate Quiz" button. QuizWhiz's AI will process your input material and create your quiz in seconds!
It usually takes a few seconds to generate the quiz. For large inputs and question sets, it can take a few minutes.
Step 4: Review, Edit, and Customize
After the quiz is generated, you'll be taken to the review/edit screen. Here, you can:
- Review each question and answer: Carefully check each question and answer for accuracy and clarity.
- Edit questions and answers: Modify the wording, add or remove answer options, and correct any errors.
- Delete questions: Remove any questions or question sets that you don't want to include.
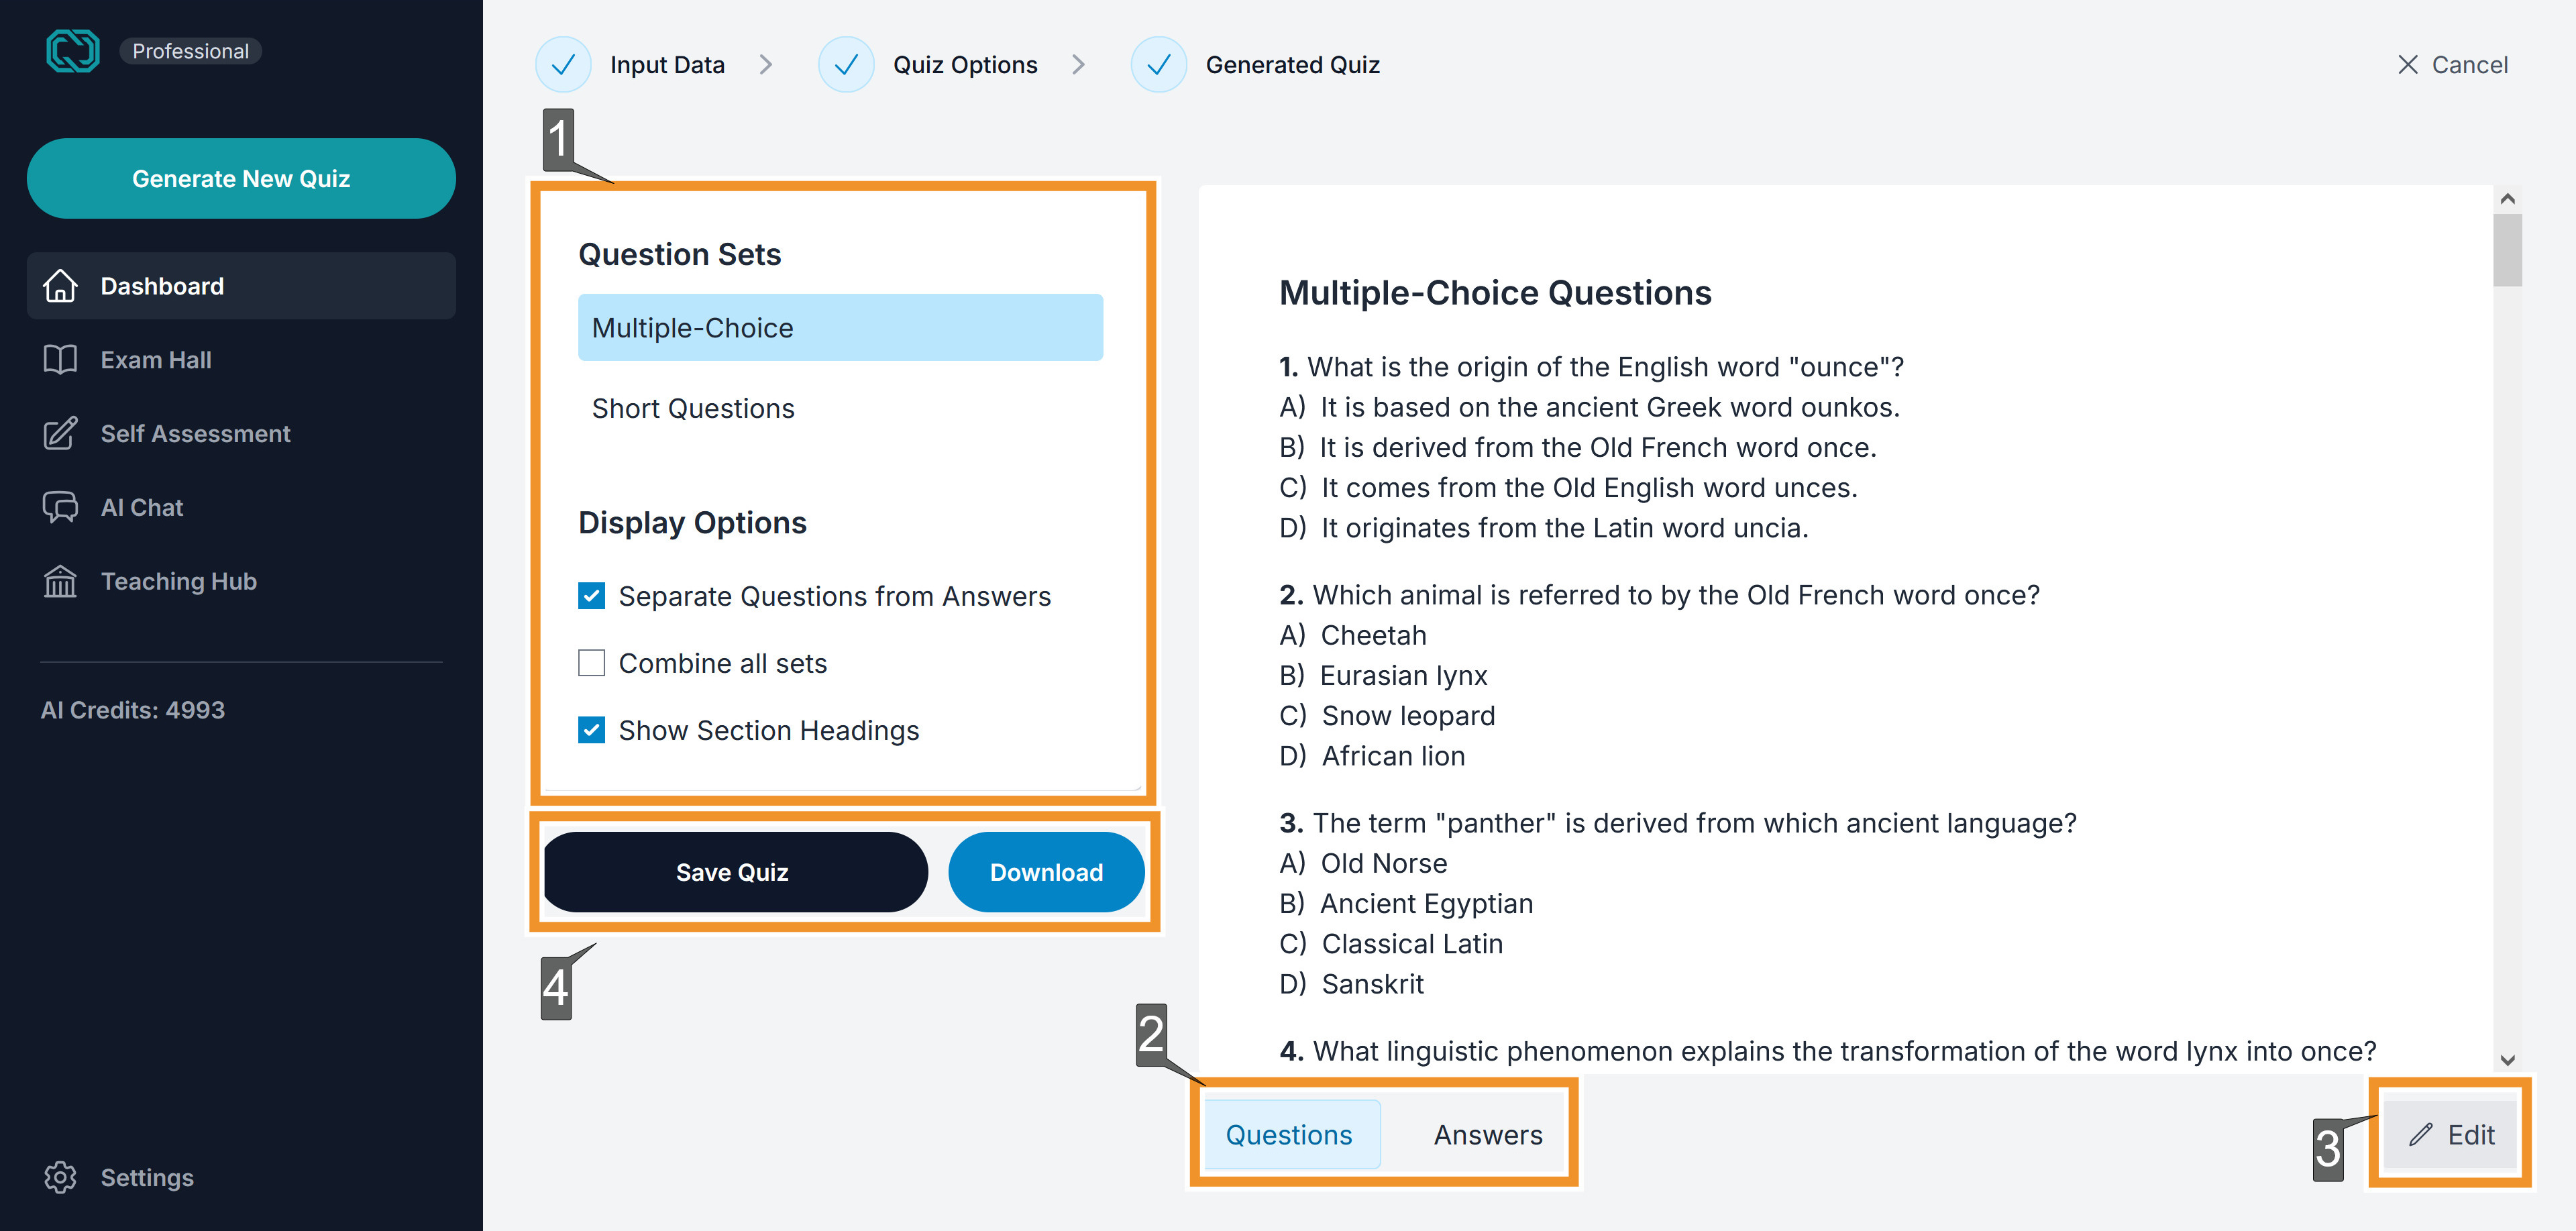
Highlighted Sections:
- This is where you can select the question set to view/edit, and also choose the Display options.
- Switch between Questions and Answers when "Separate Questions and Answers" display option is checked.
- Edit the questions. You can edit the text or remove questions from the list, including the entire question set.
- Save or download the quiz.
Step 5: Download, Export or Host
When you're satisfied with your quiz, you have these options:
- Download:
- Click the "Download" button.
- Choose your desired file format (PDF, DOCX, TXT).
- Click "Download" again to save the quiz to your computer.
- Export to Google Forms:
- Click the "Export to Google Forms" button.
- Follow the prompts to connect your Google account (if you haven't already).
- The quiz will be automatically imported into a new Google Form.
- Host Online:
- Click the "Host Online" button.
- QuizWhiz will generate a unique link to your quiz.
- Share the link.
- Student responses will be automatically graded, and you can view the results in your QuizWhiz account.
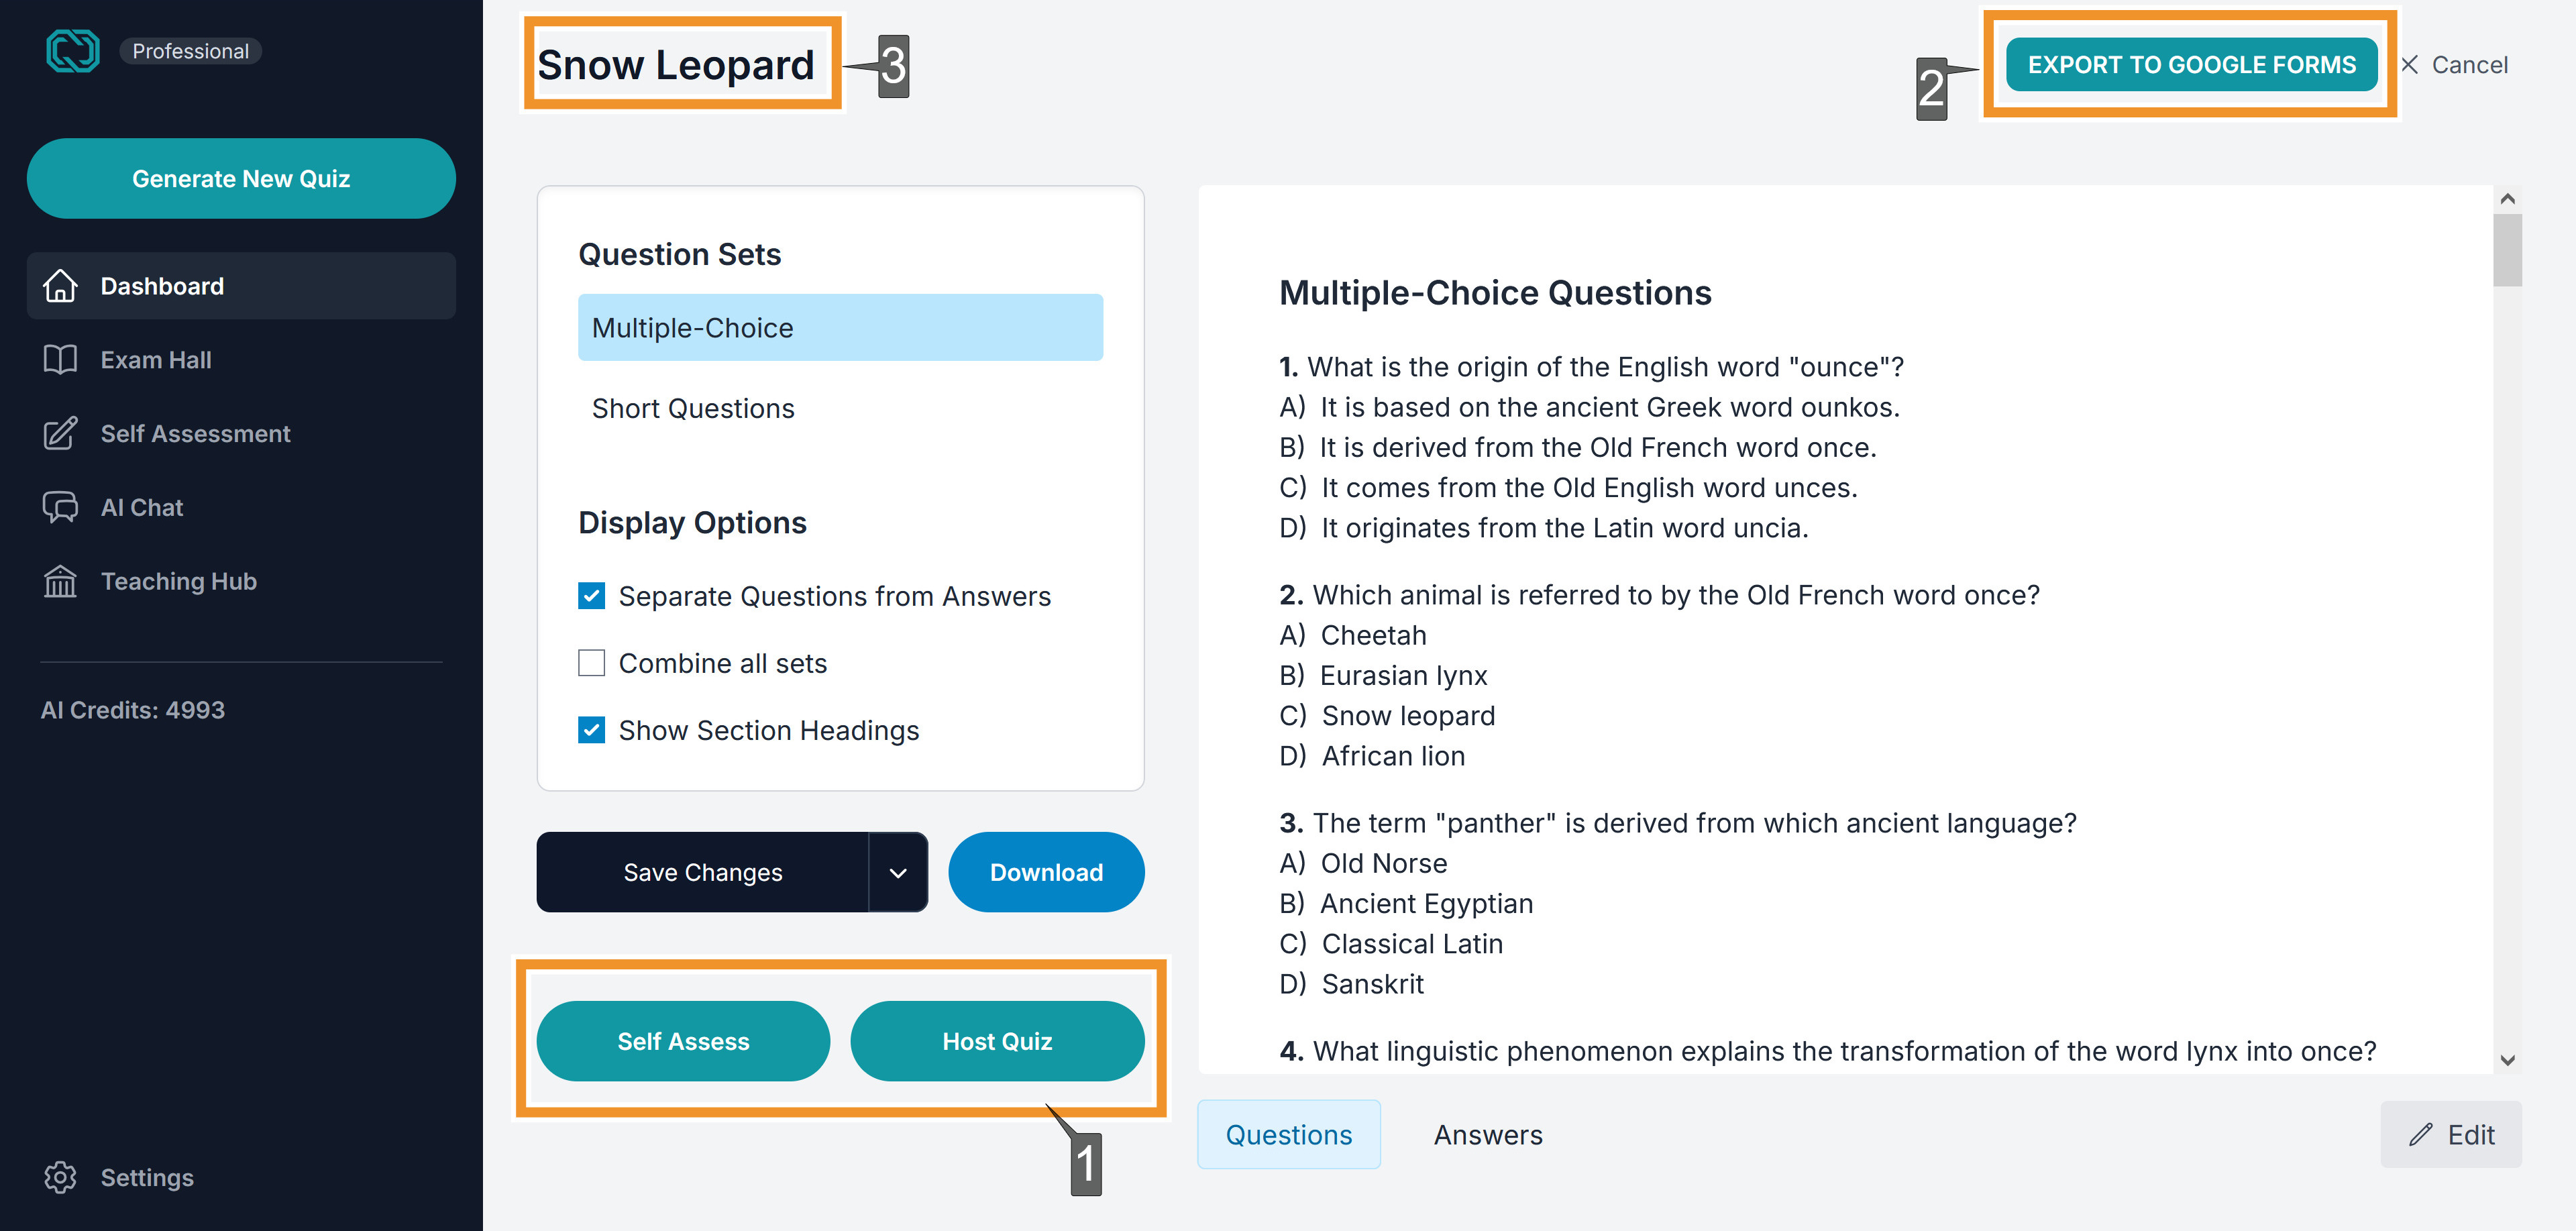
Highlighted Sections:
- Host the Quiz, as discussed above. "Self Assess" will allow you to test your own knowledge on the quiz and take the quiz yourself. This is geared more towards students, but still useful for testing the quiz yourself.
- If Google Integration is setup (from Settings > Integrations), then you will be able to export the quiz directly as a Google Form.
Conclusion
This guide provides a comprehensive walkthrough of the quiz creation process. For more detailed information on specific features, please refer to our other user guides. Good luck creating amazing quizzes!
If you have any further questions, please don't hesitate to contact us at admin@quizwhiz.ai.