Hosting and Grading Your Quizzes in QuizWhiz
This guide explains how to host your quizzes online using QuizWhiz, take advantage of automatic grading, and access and manage student results.
Hosting Your Quiz Online
Once you've created and reviewed your quiz, hosting it online is simple:
- Go to the Teaching Hub > Hosted Quizzes section and find the quiz you want to host.
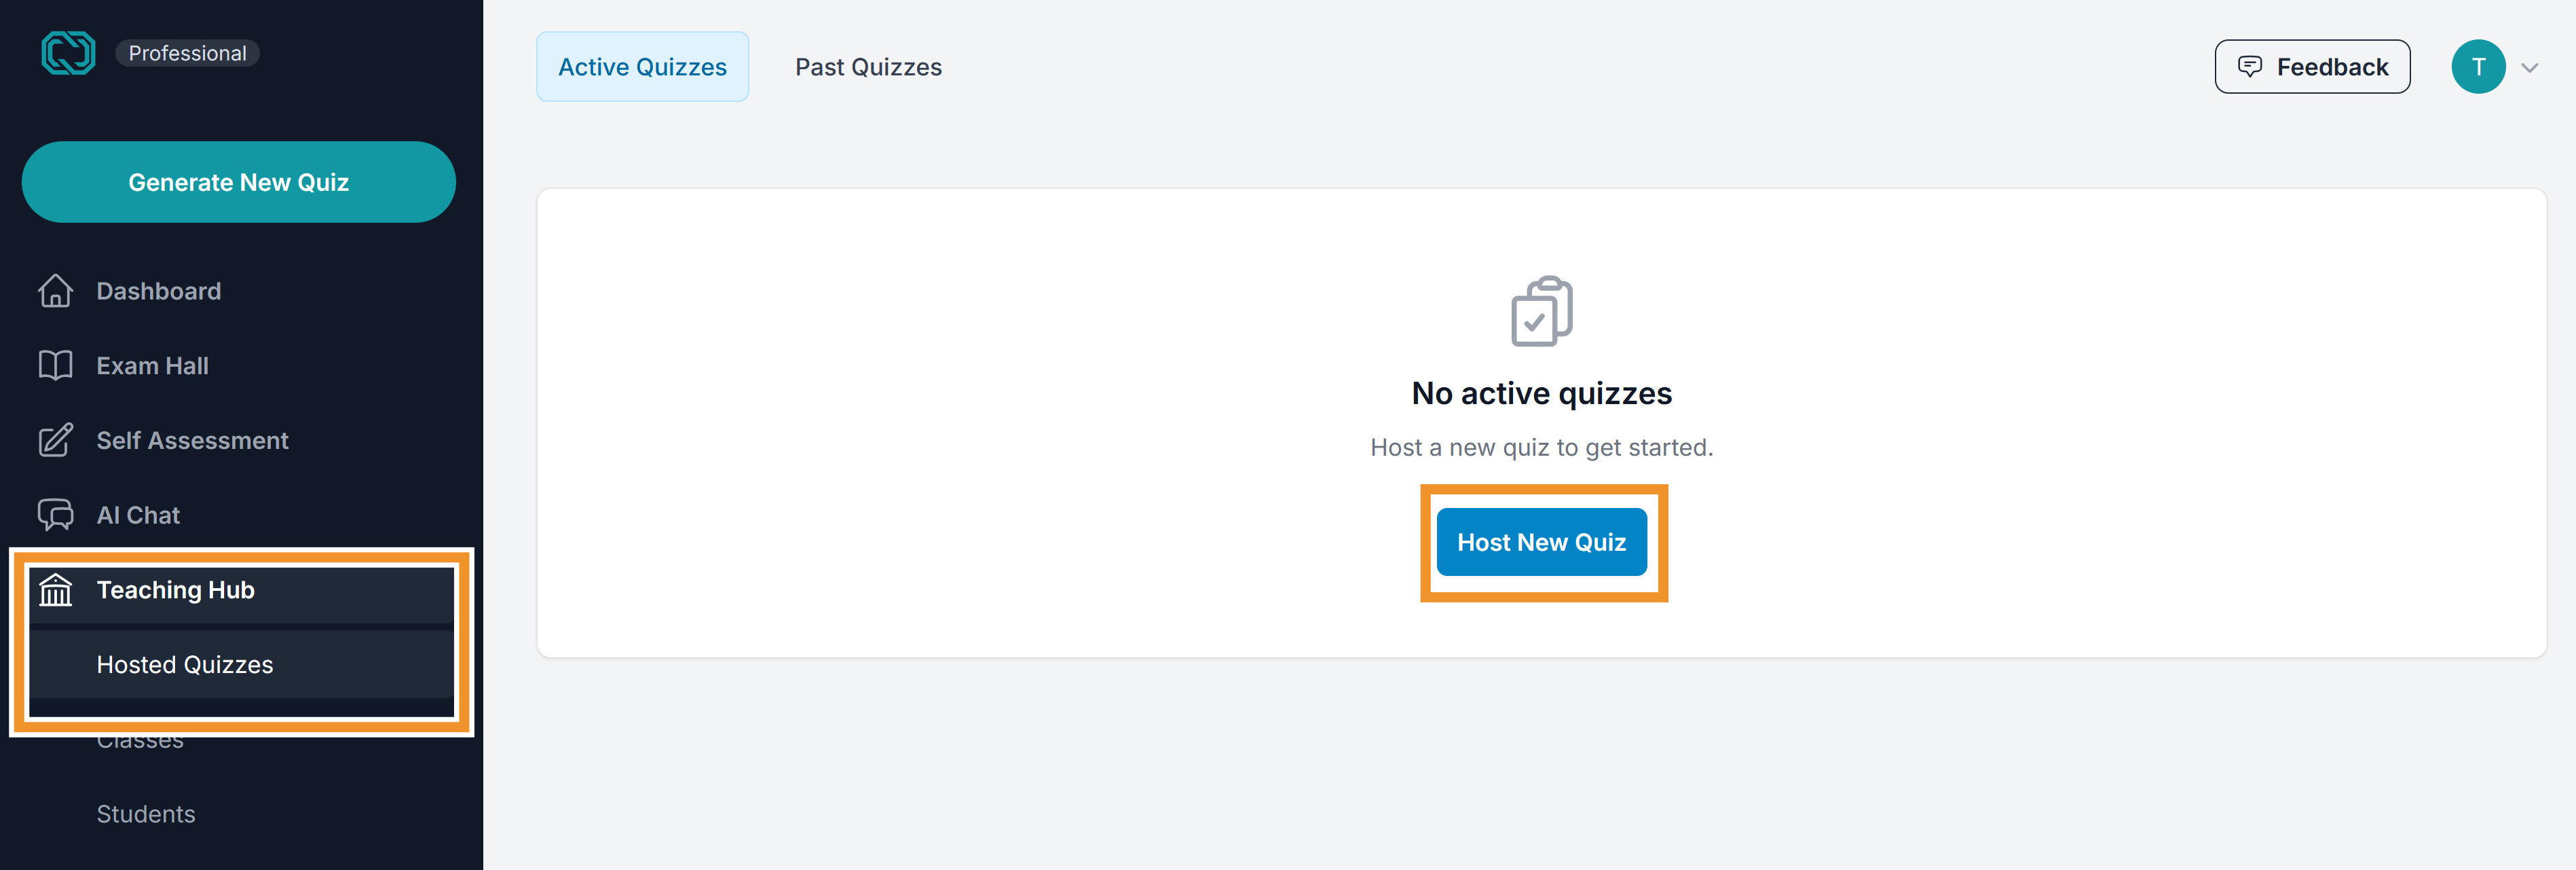
- Click on Host New Quiz button, then from the list find your quiz and click Host Quiz.
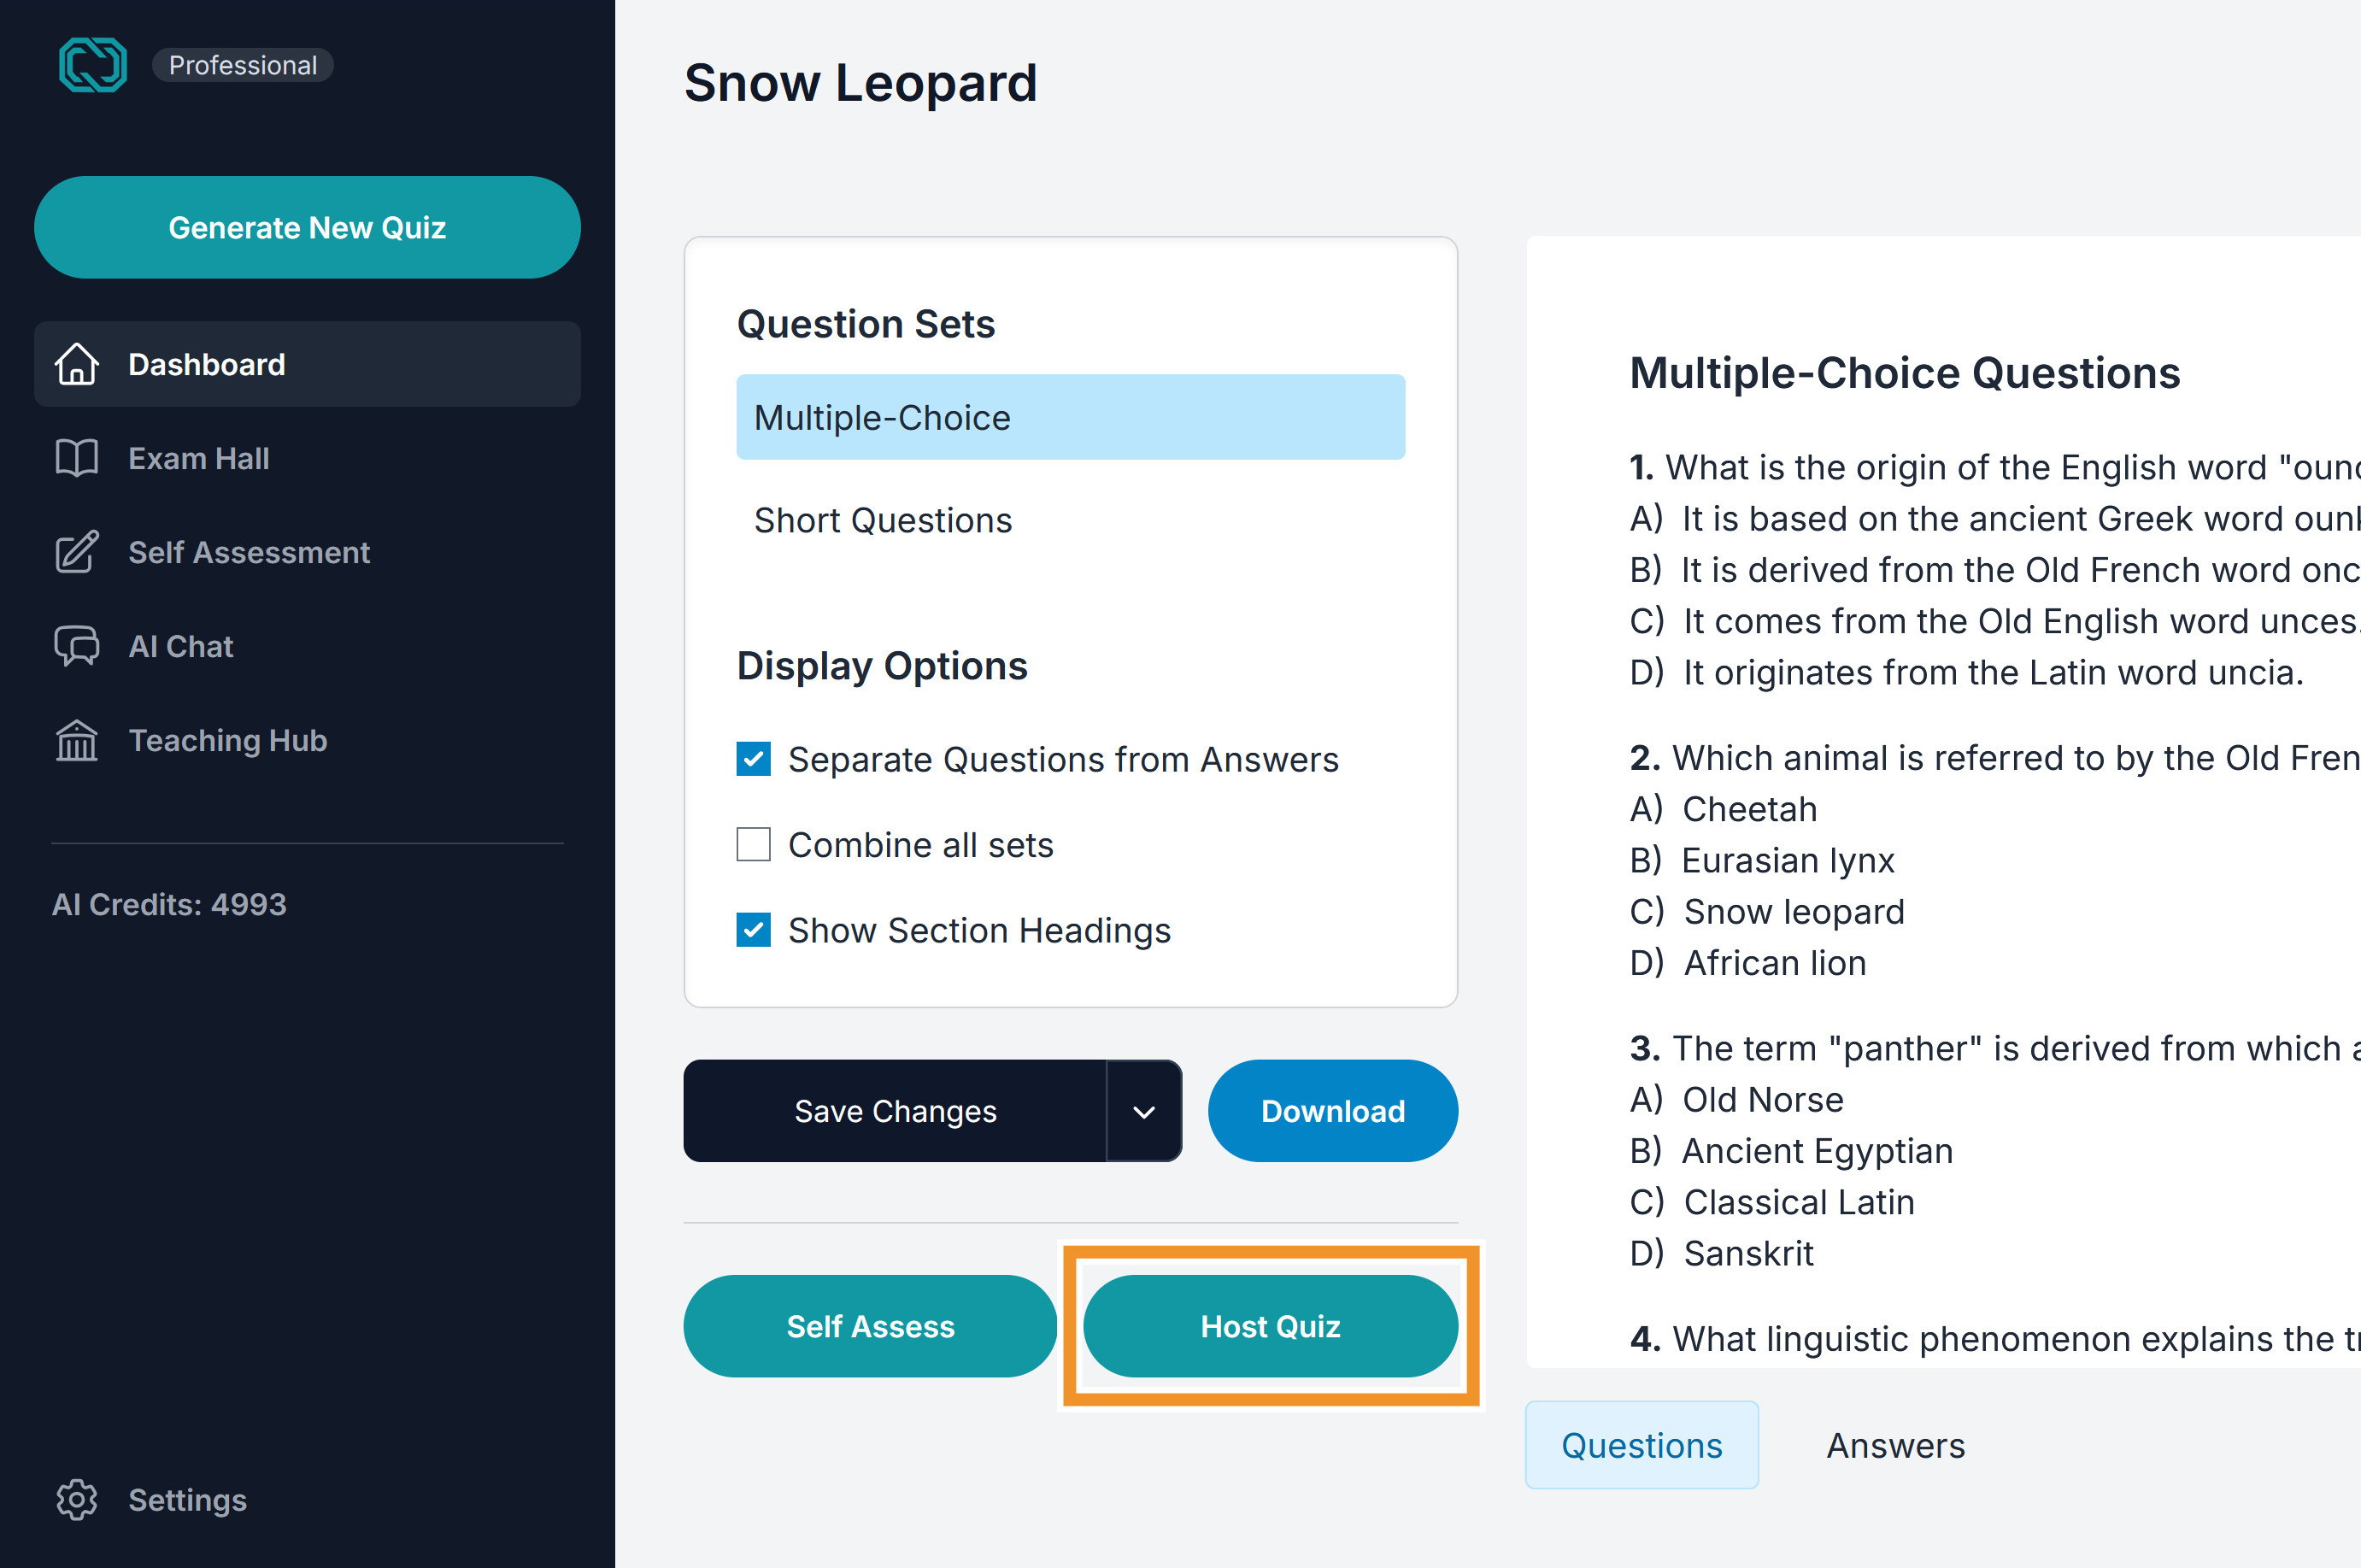
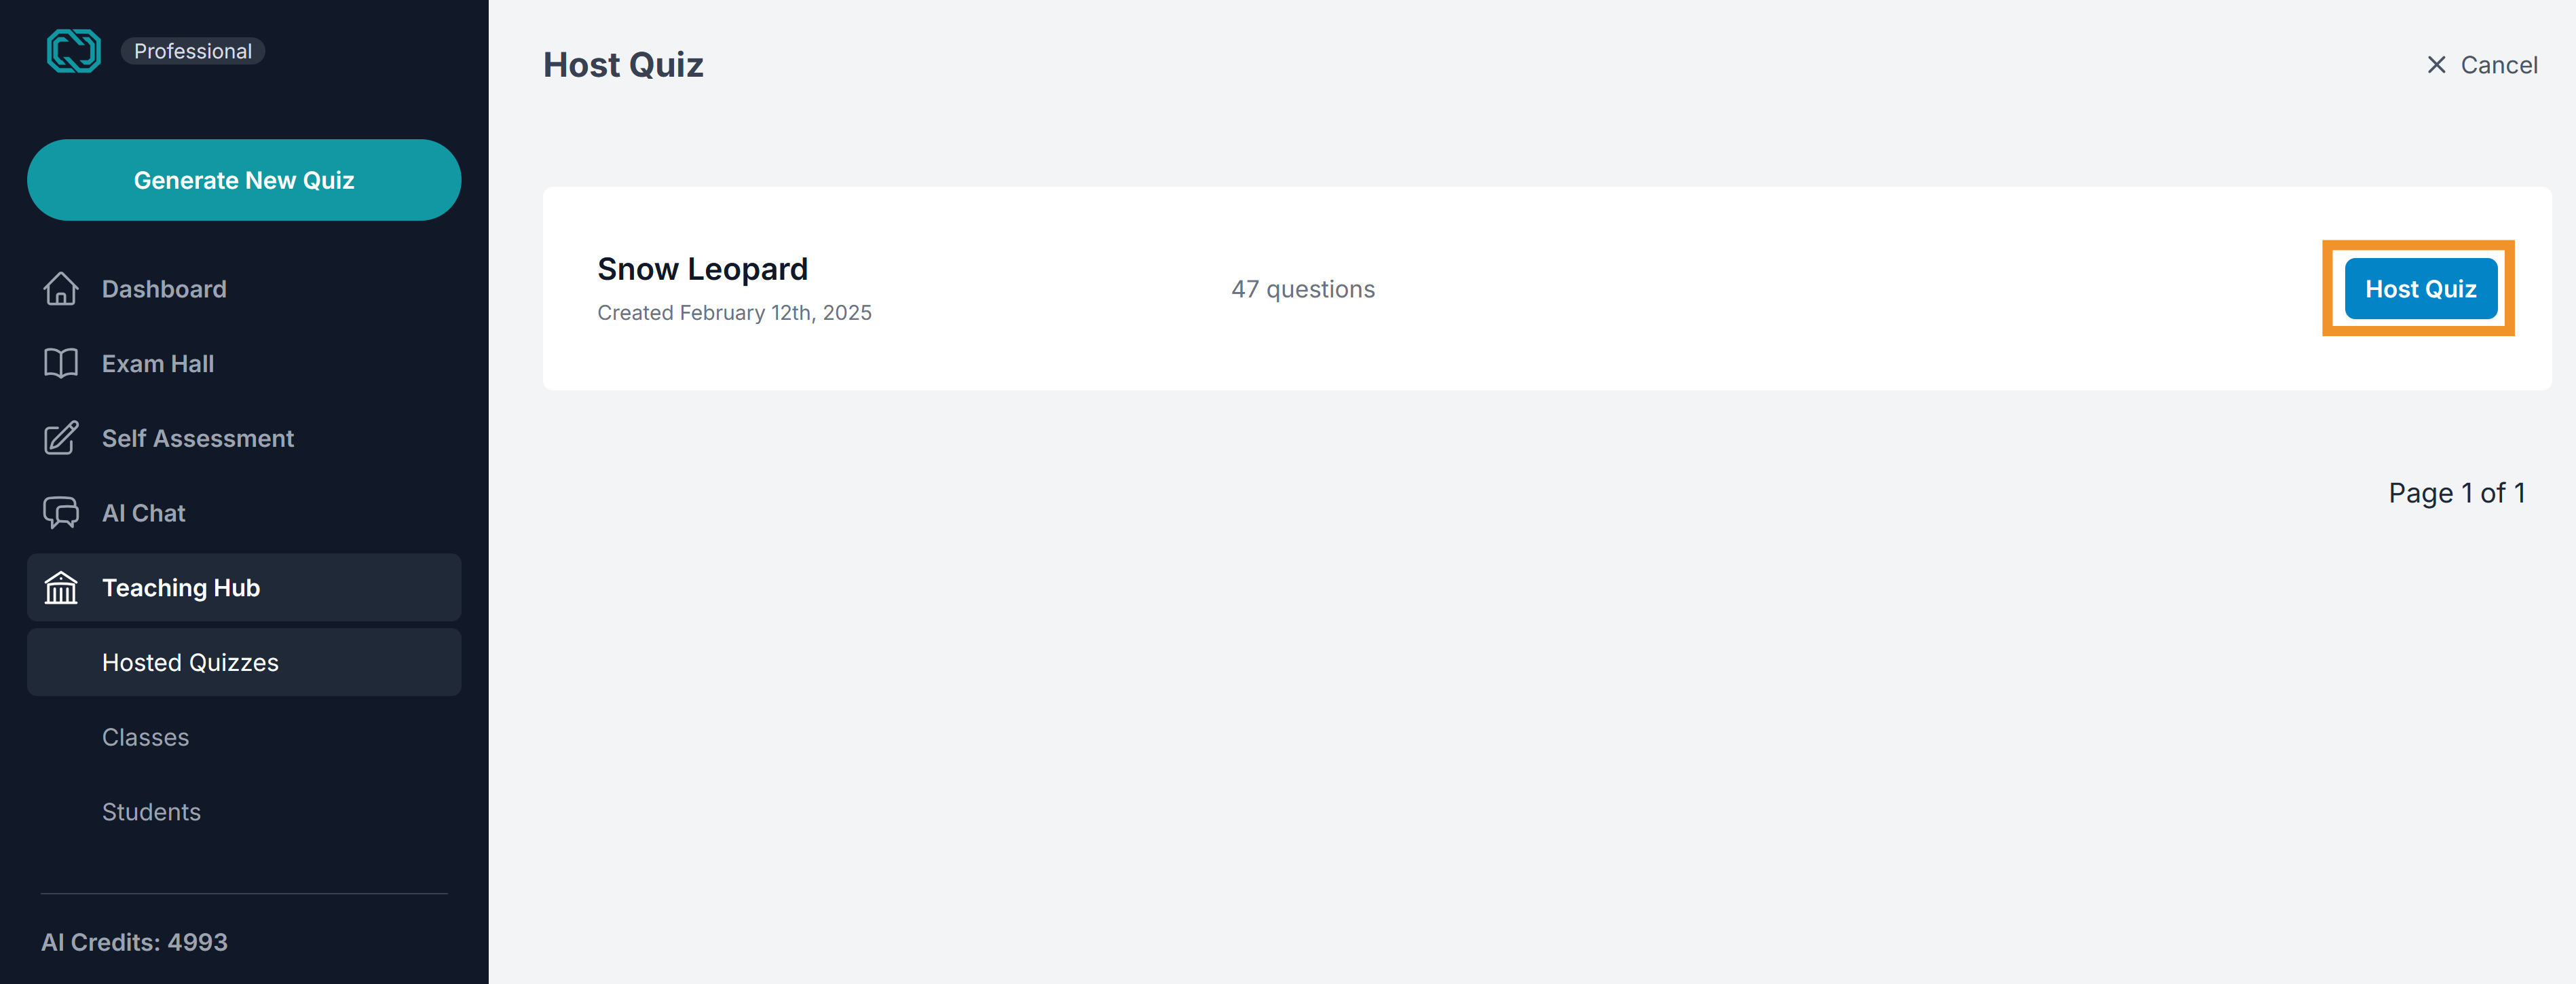 Alternatively, Go to your Quiz Detail page and click on Host Quiz
- Select the options from the Dialog that appears
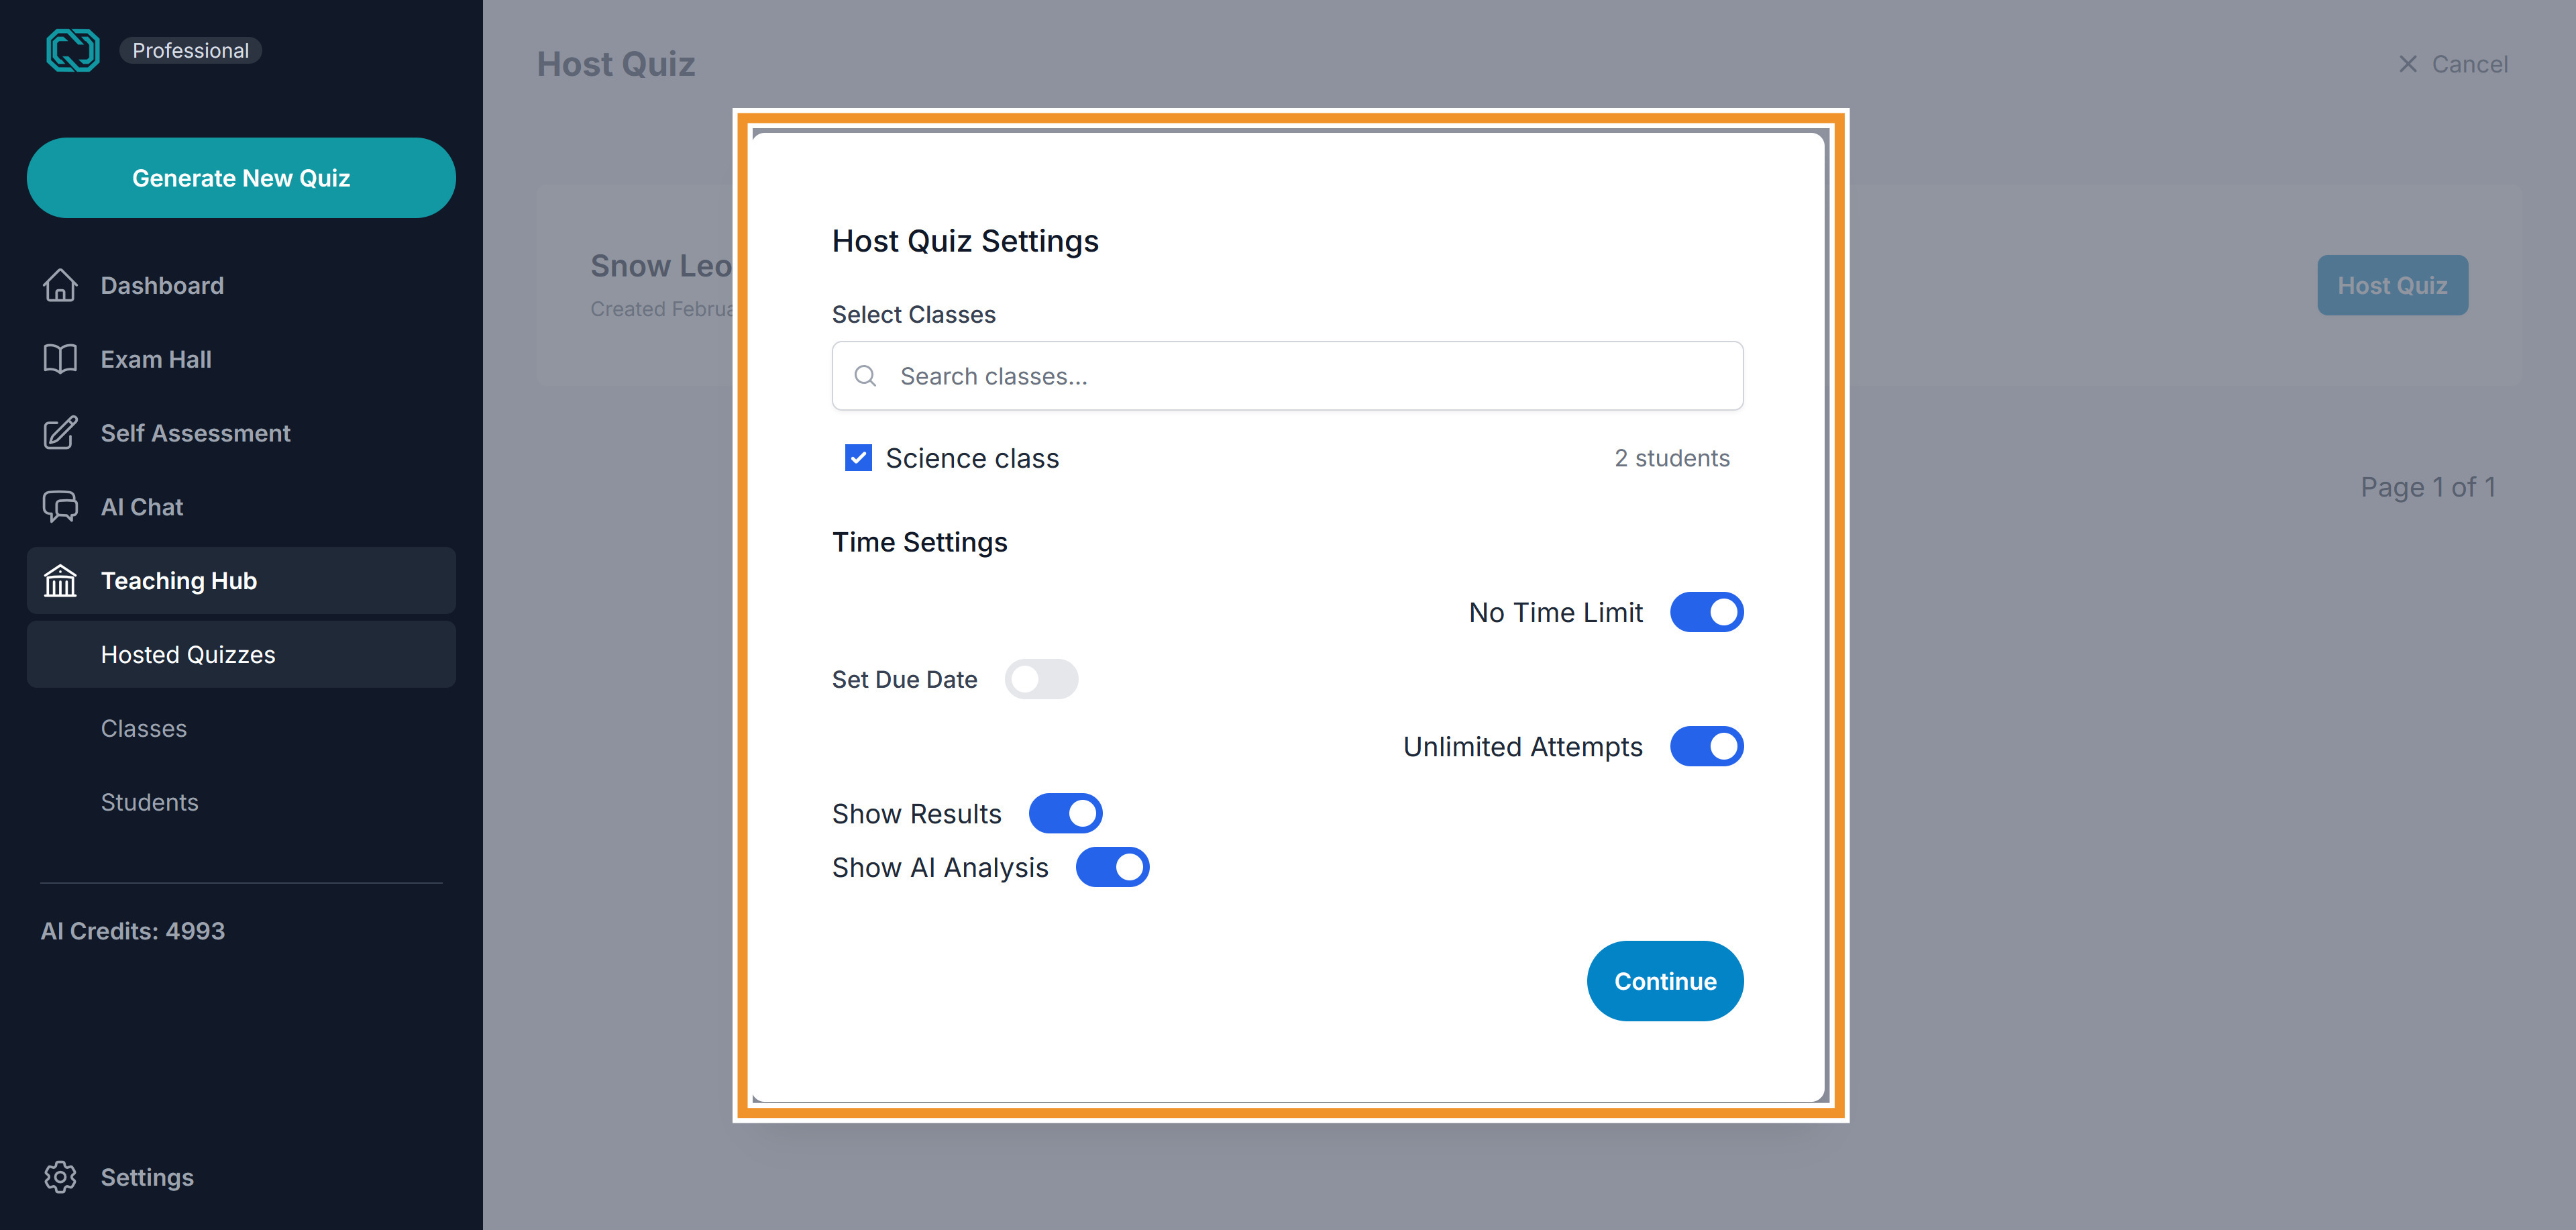
Options Breakdown:
i. Select Classes: Here you can select one or more classes that you want to include in the quiz. Select them or search for them.
ii. Time Limit: You can set a time limit for the quiz or set to to have no time limit.
iii. Due Date: Set a due date or none at all.
iv. Max Attempts: Set the maximum number of attempts allowed for the user.
v. Show Result and AI Analysis: You have the option to hide the results from the user.
Click the Confirm button after reviewing all the options.
Inviting the Students
There are 2 basic methods of inviting the students:
i. Send them an email through QuizWhiz.
ii. Copy the url and send them the link yourself.
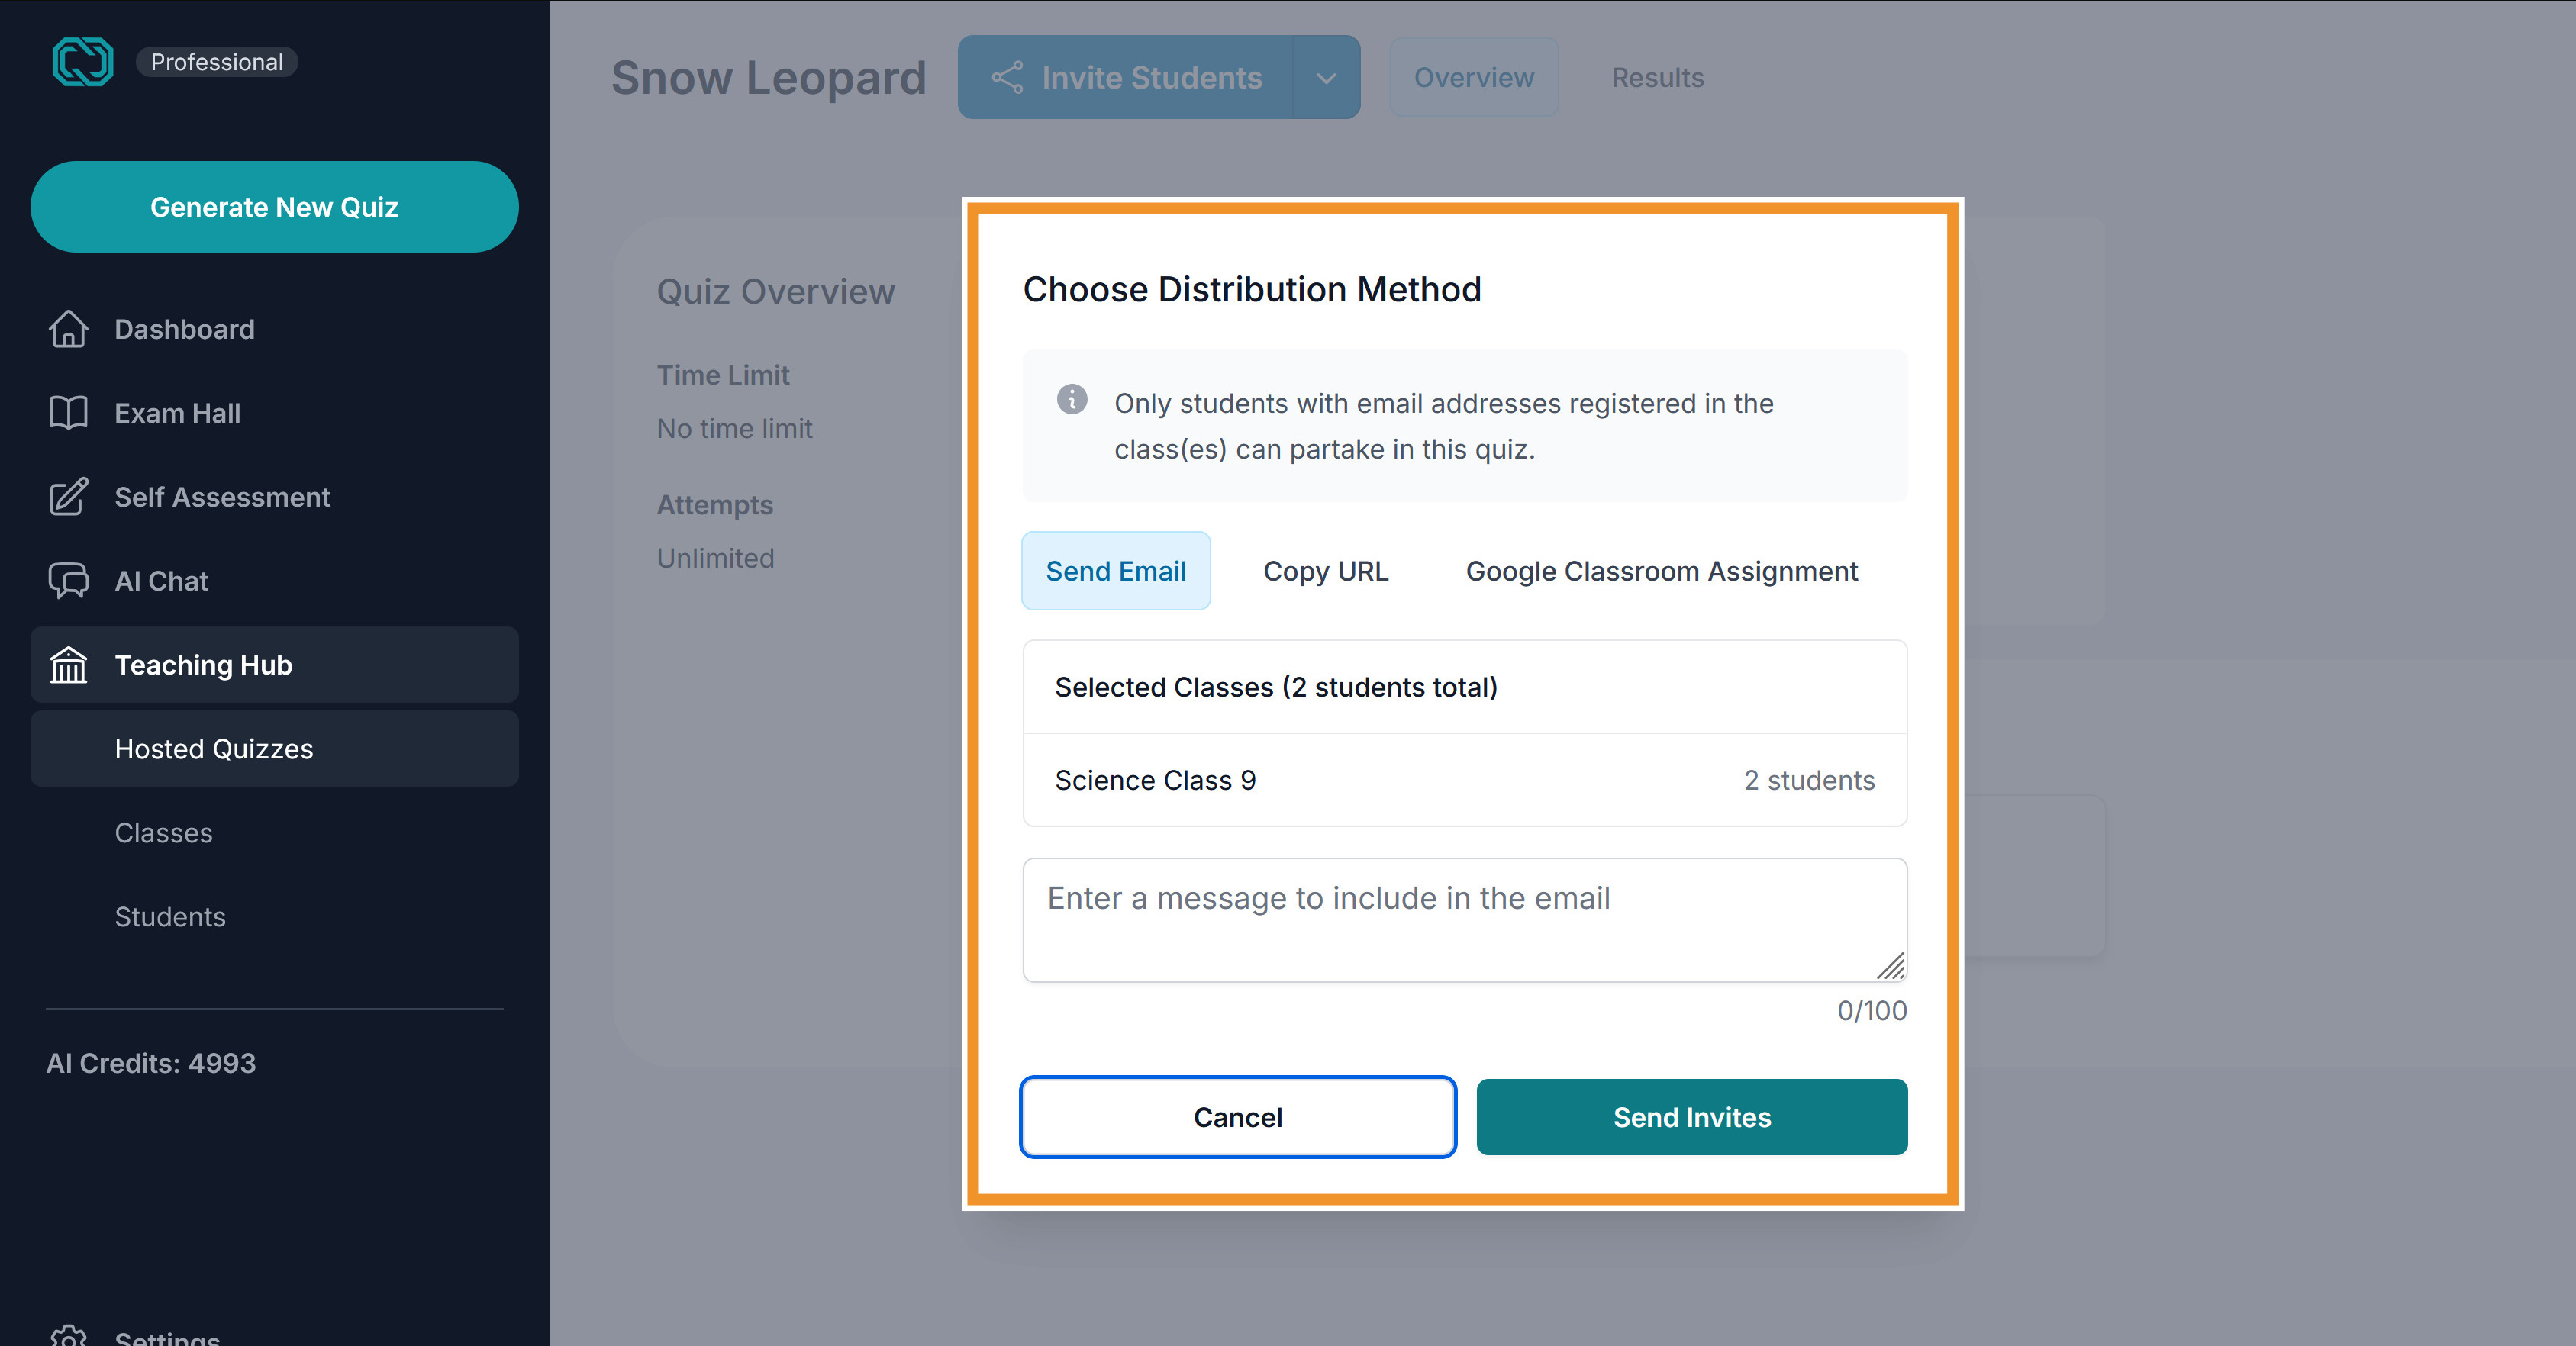
The students can then folllow the link, either from the email or the one you sent them, and perform the quiz on our site. They will simply have to create a free account to participate in the quiz.
Once they have participated, the results will be available for you to review.
Google Classroom - 3rd method
If you have connected with Google Classroom, you will find a 3rd option.
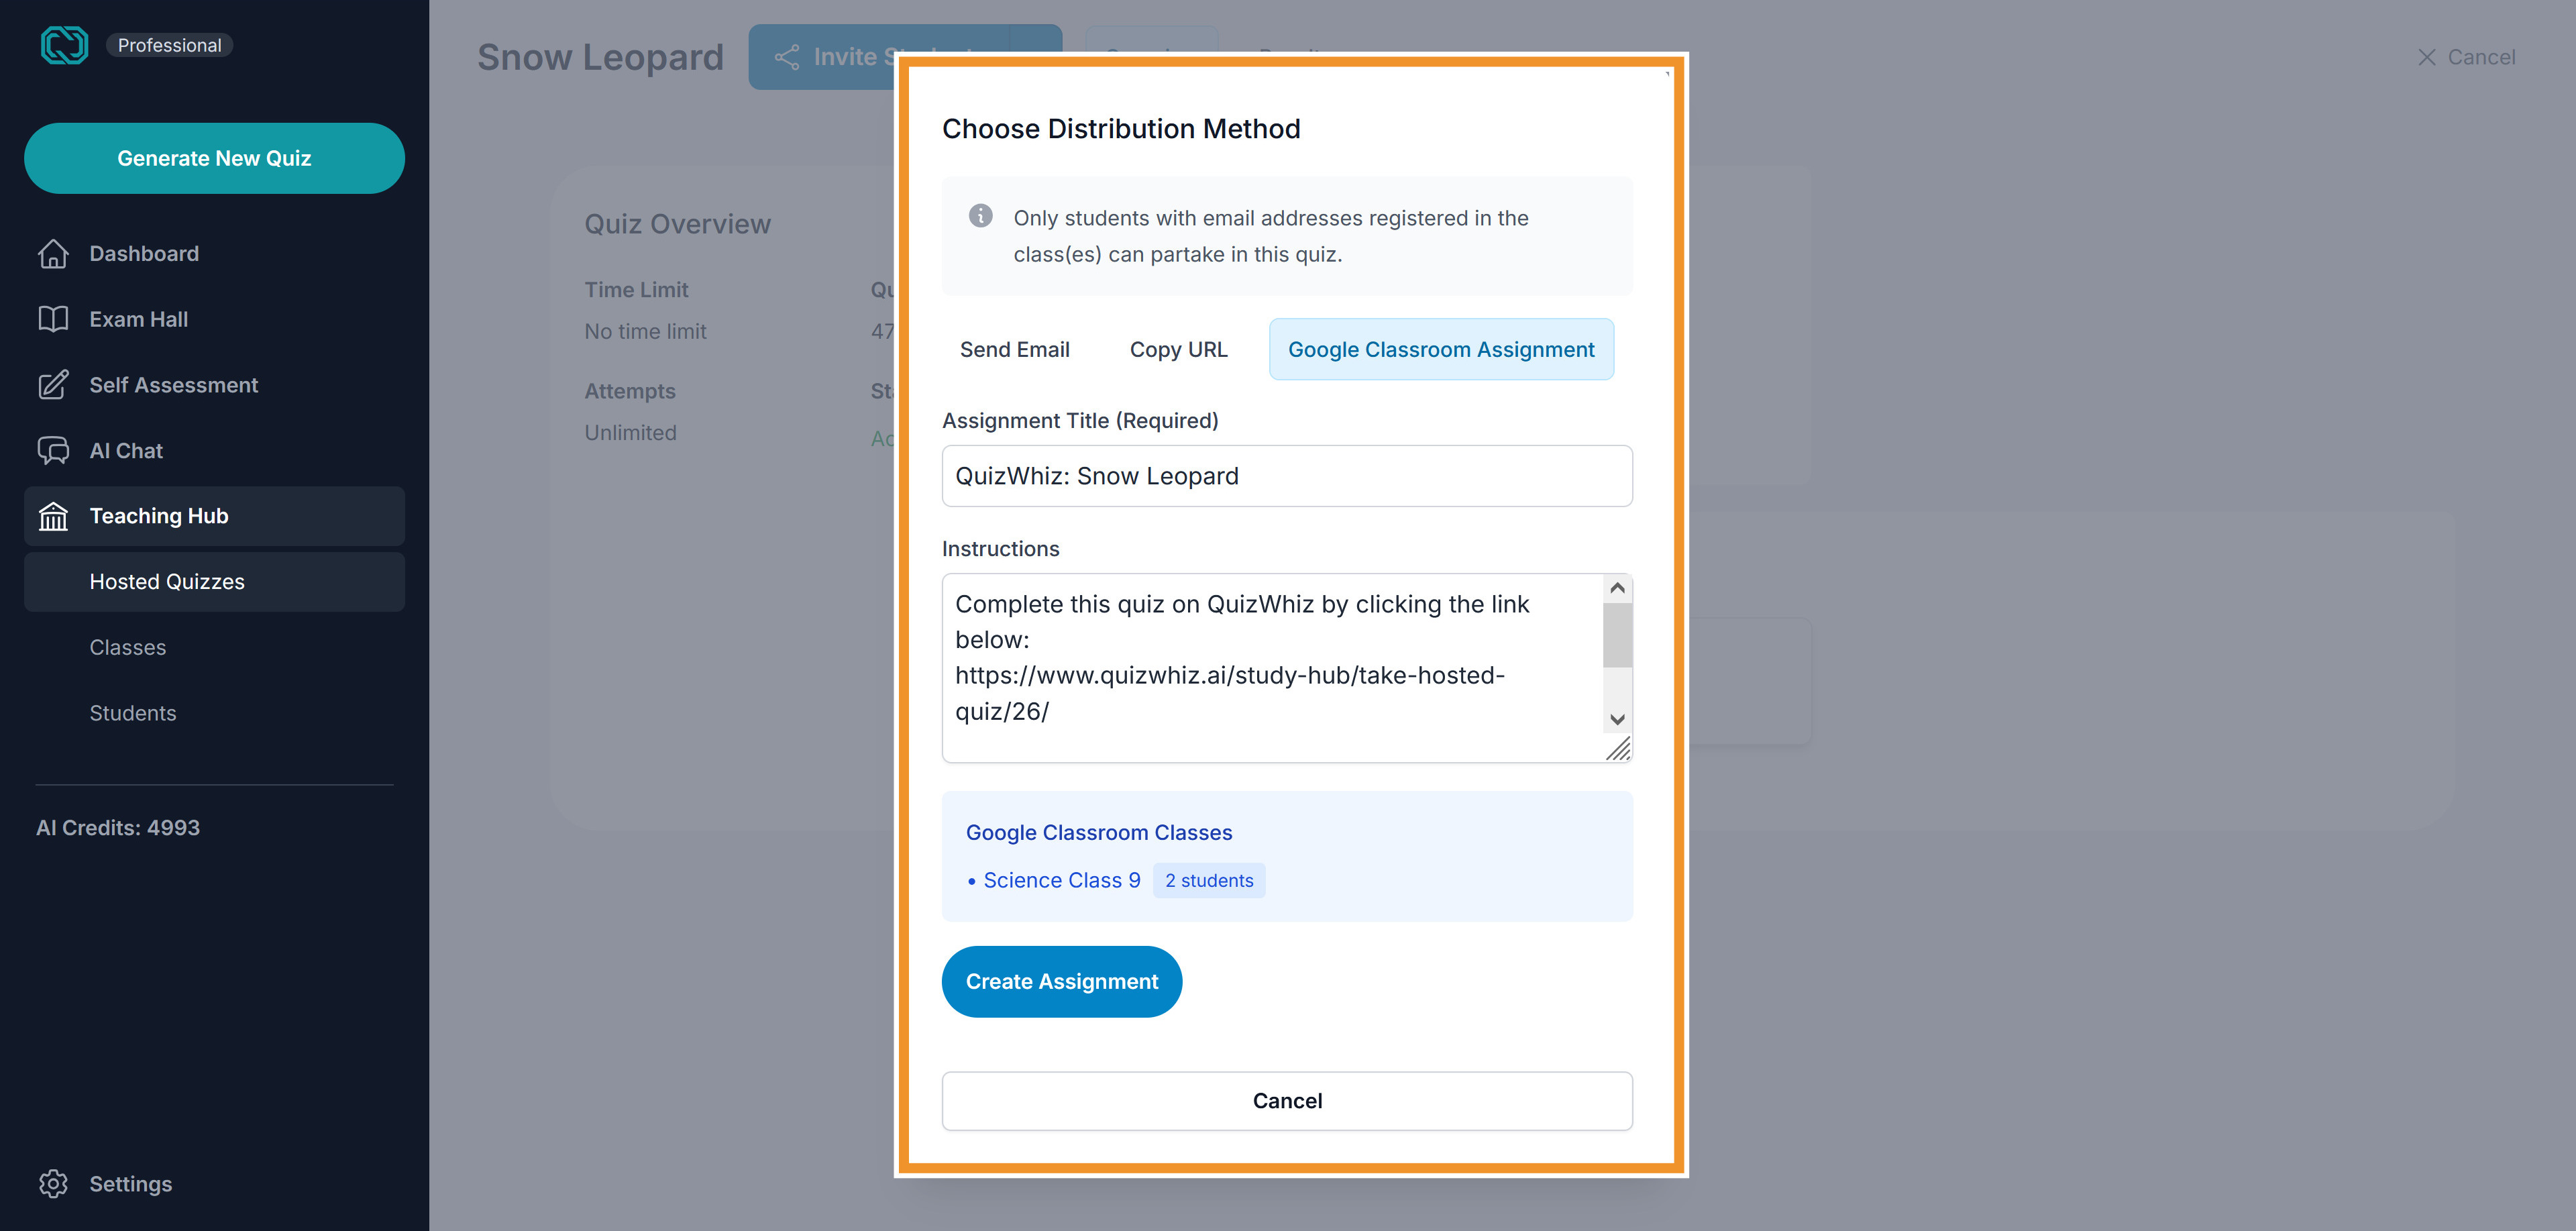
See Google Classroom integration guide
Viewing Results
As the students begin to participate, you will be able to access the results of their performance. To do so, on the Hosted Quiz Detail page, click on the "Results" tab.
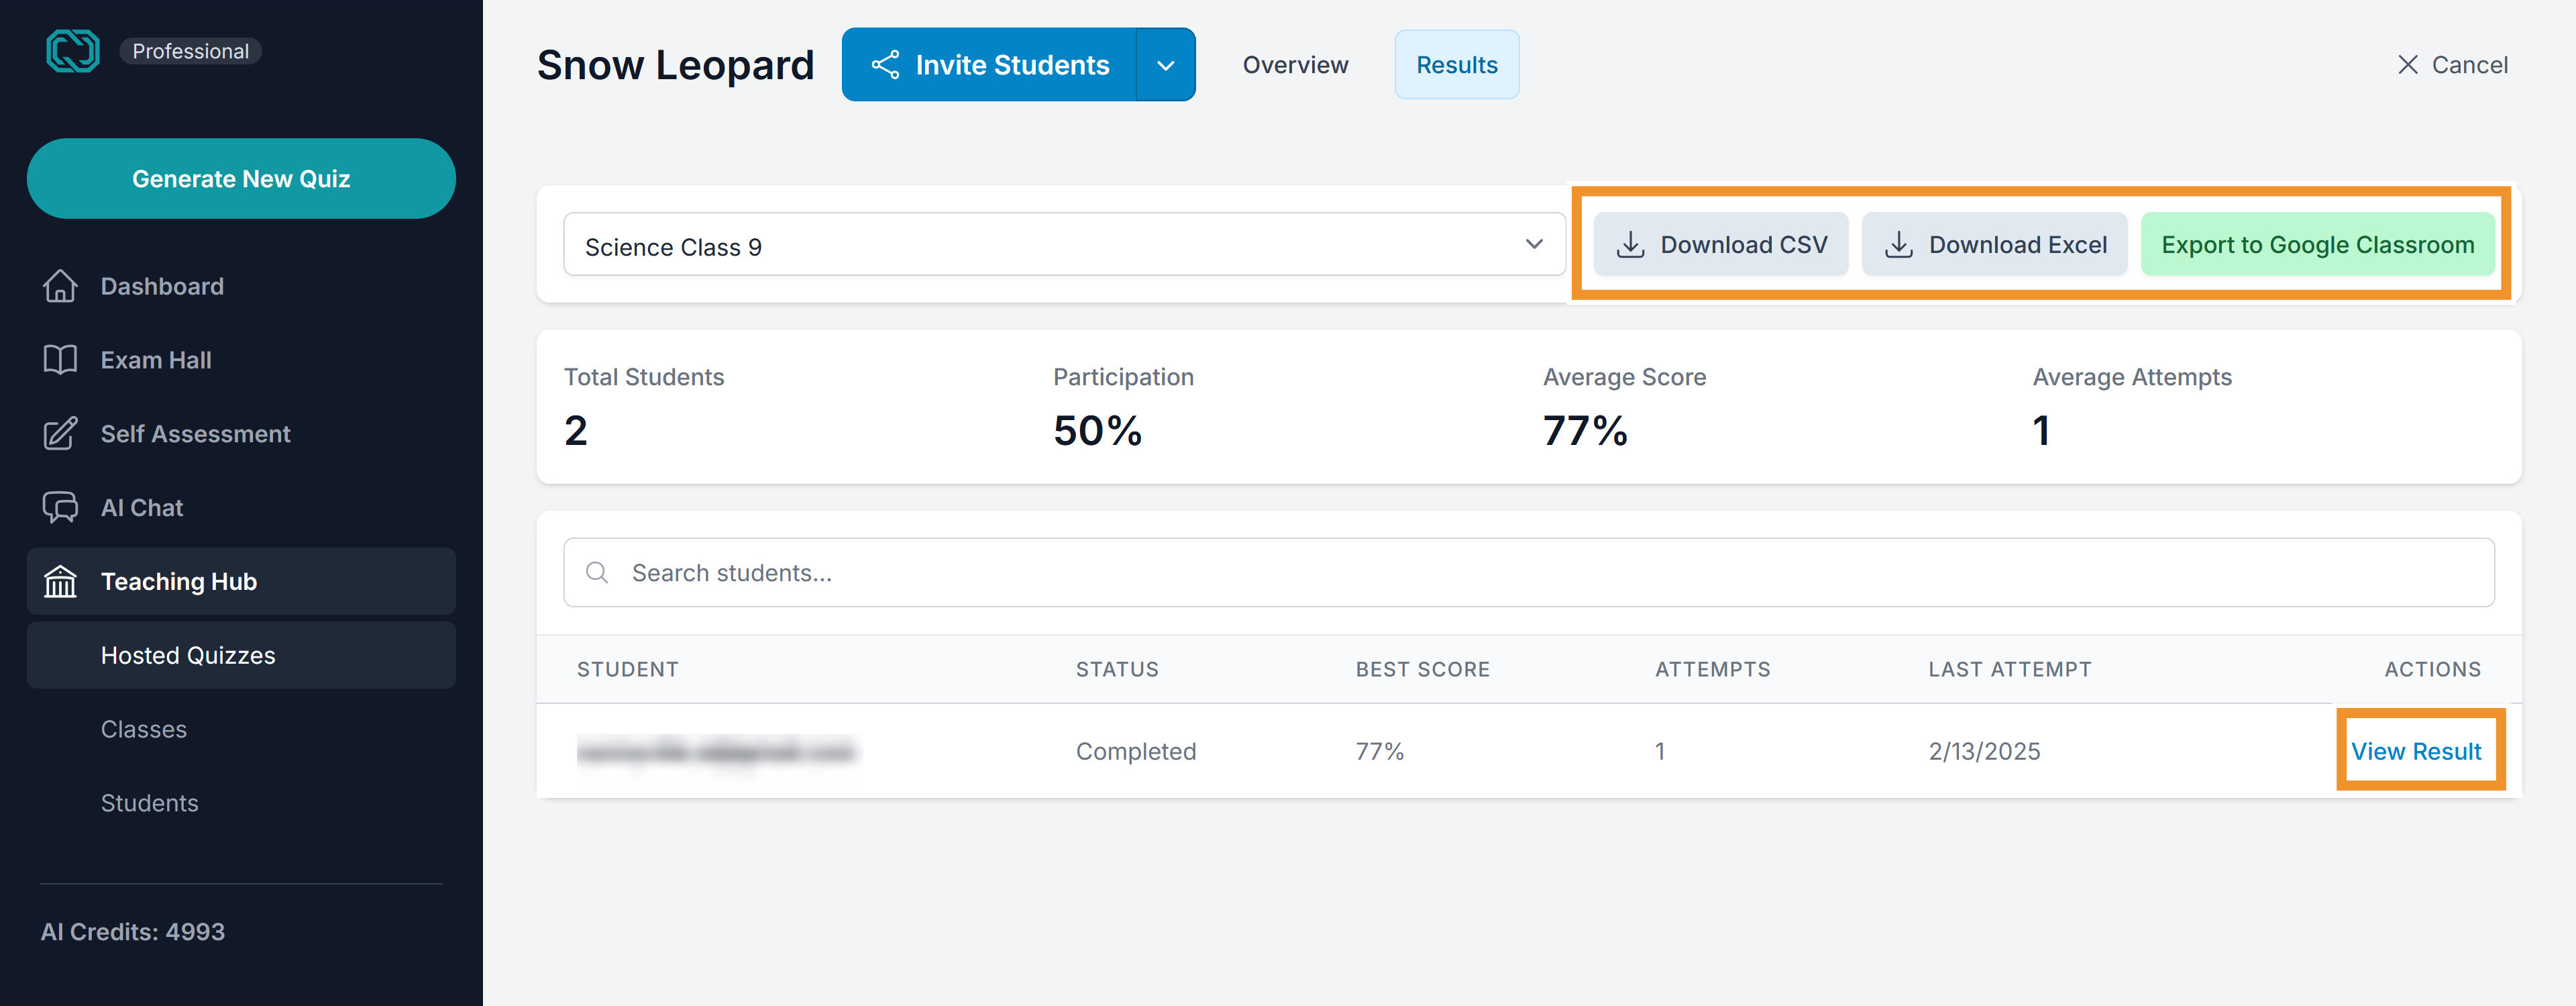
- Here you can view the results of all the classes at once, or select and view that for a single class.
- You have the option to download the results as an .xls or .csv file. You can also export the results as grades to Google Classroom, if you have the integration set up.
- You can also view the individual student's detailed report by clicking the "View Result" link.
Automatic Grading
QuizWhiz provides detailed AI-powered analysis of the students performance and intelligently tracks it overtime. The grading consists of 4 things:
- Basic grading of the student's answers for an attempt. This includes the final score scored as a percentage and all the individual questions and answers (including correct and student's answer) of the quiz.
- Skills breakdown. When the user first attempts a quiz, our AI systems identify 5-10 key skills based on the quiz and student's answers and assigns a score to it. This is then displayed as progress bars on the results page.
- Skill Tracking. QuizWhiz keeps the record of the skill-based performance of the student's recent attempts and displays them using line charts. A teacher can track the progress of all the skills or individual ones in the results page.
- AI Analysis. For each attempt of the student, the AI system analysis the results and generates a report. It attempts to identify the strengths and weakness, provides recommendations and compares with the previous analysis.
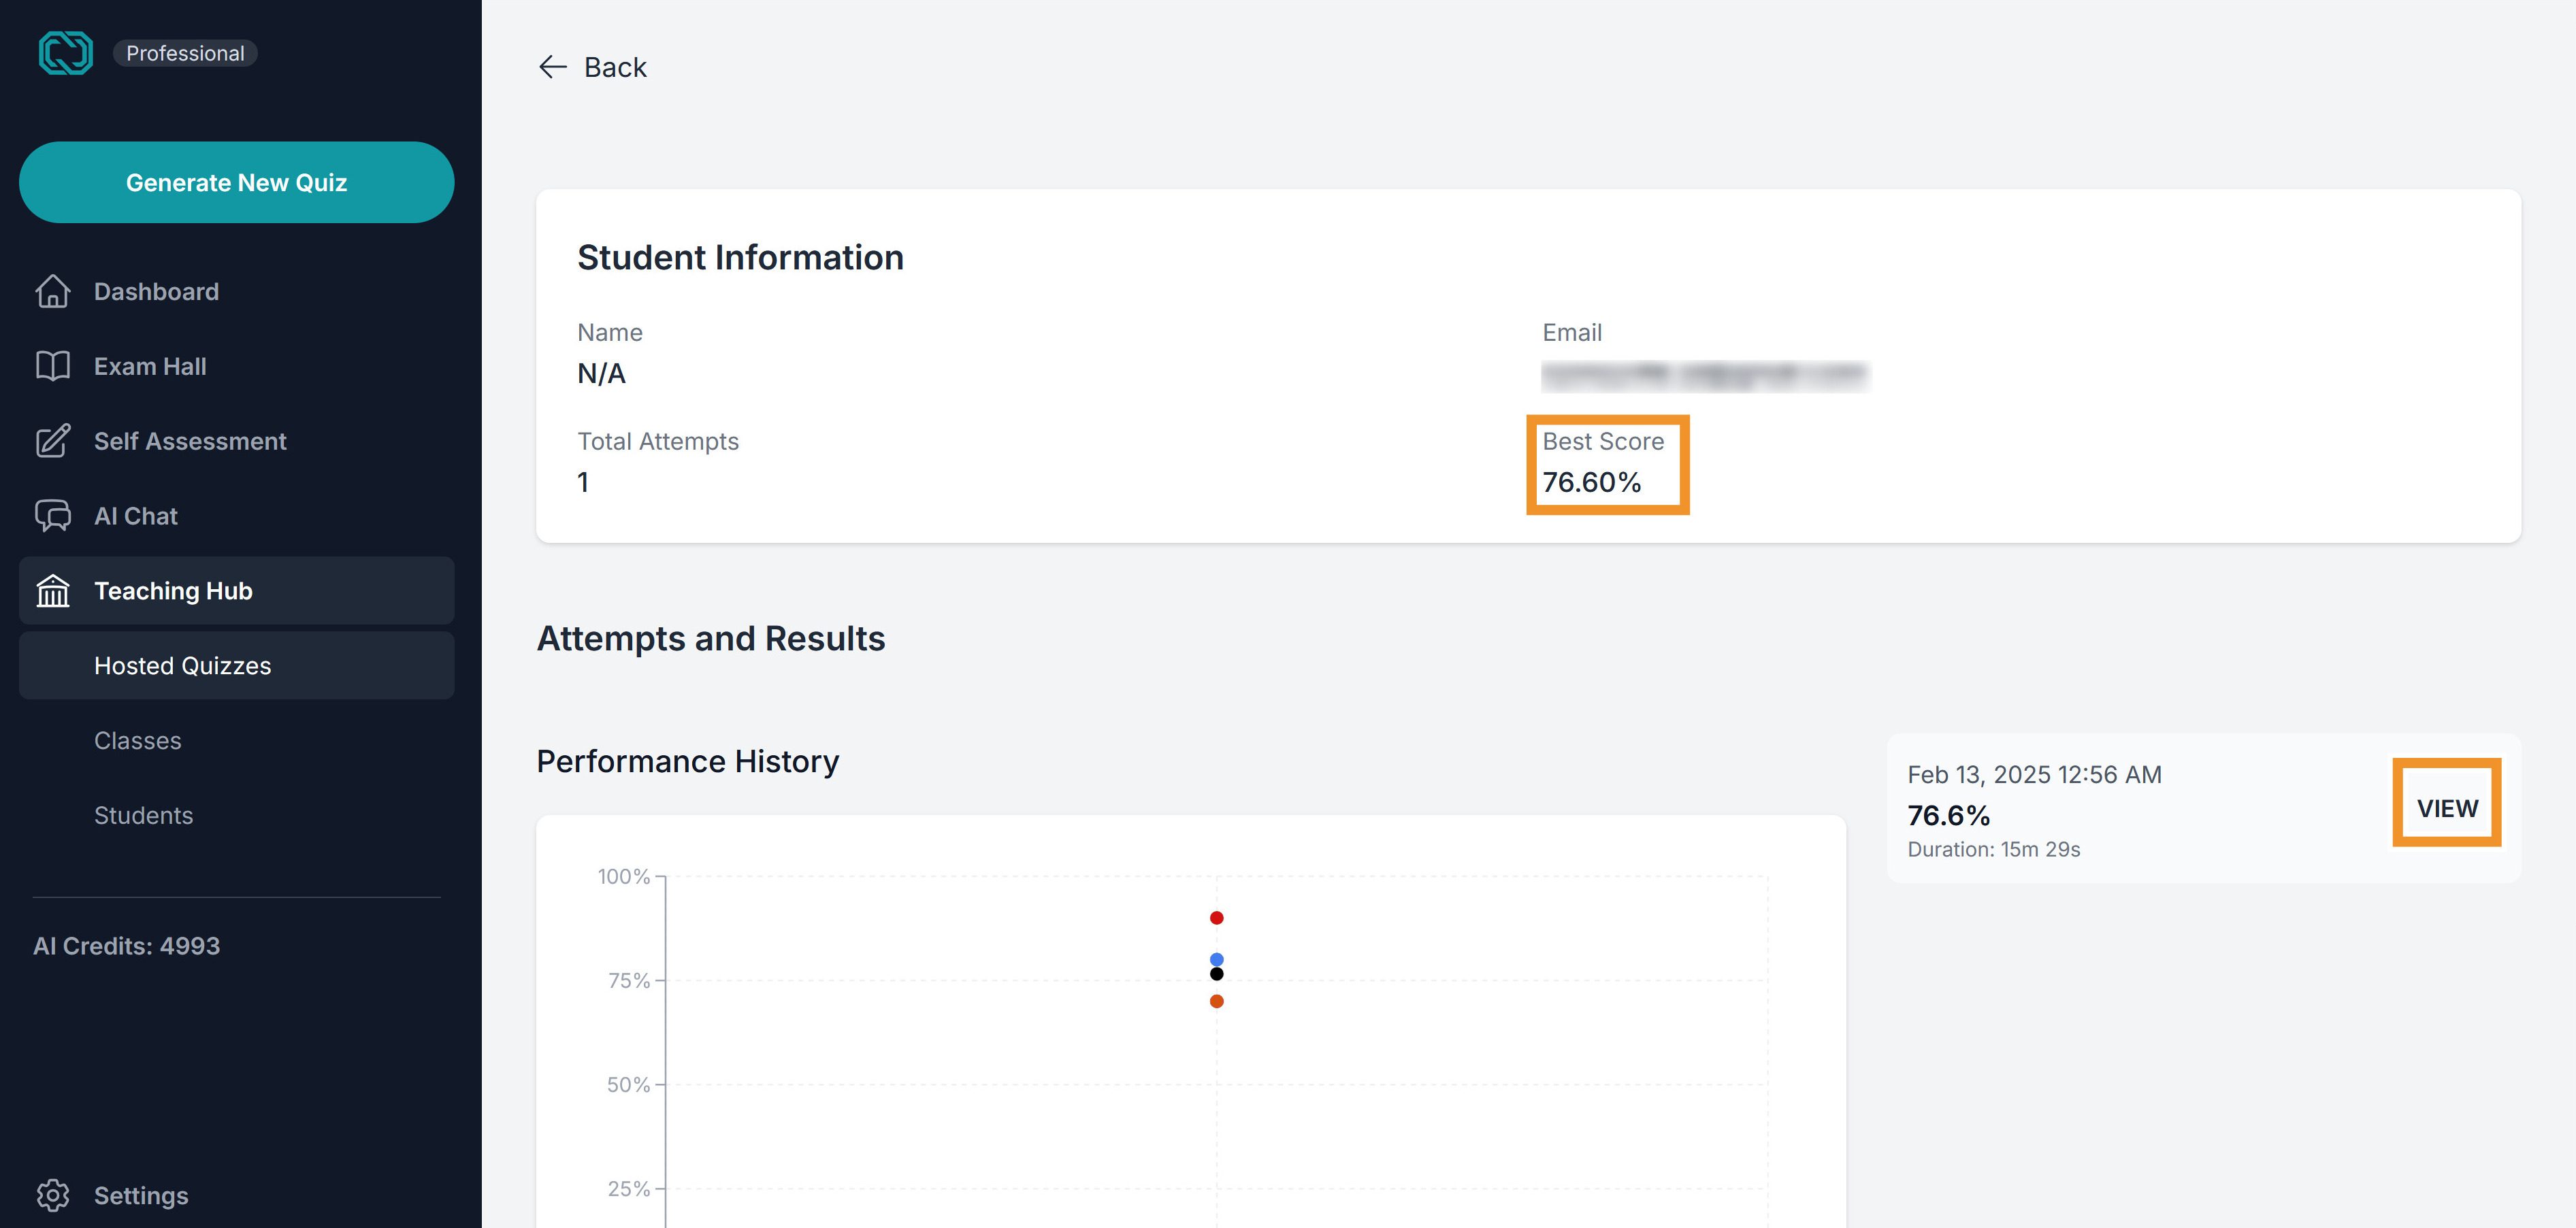
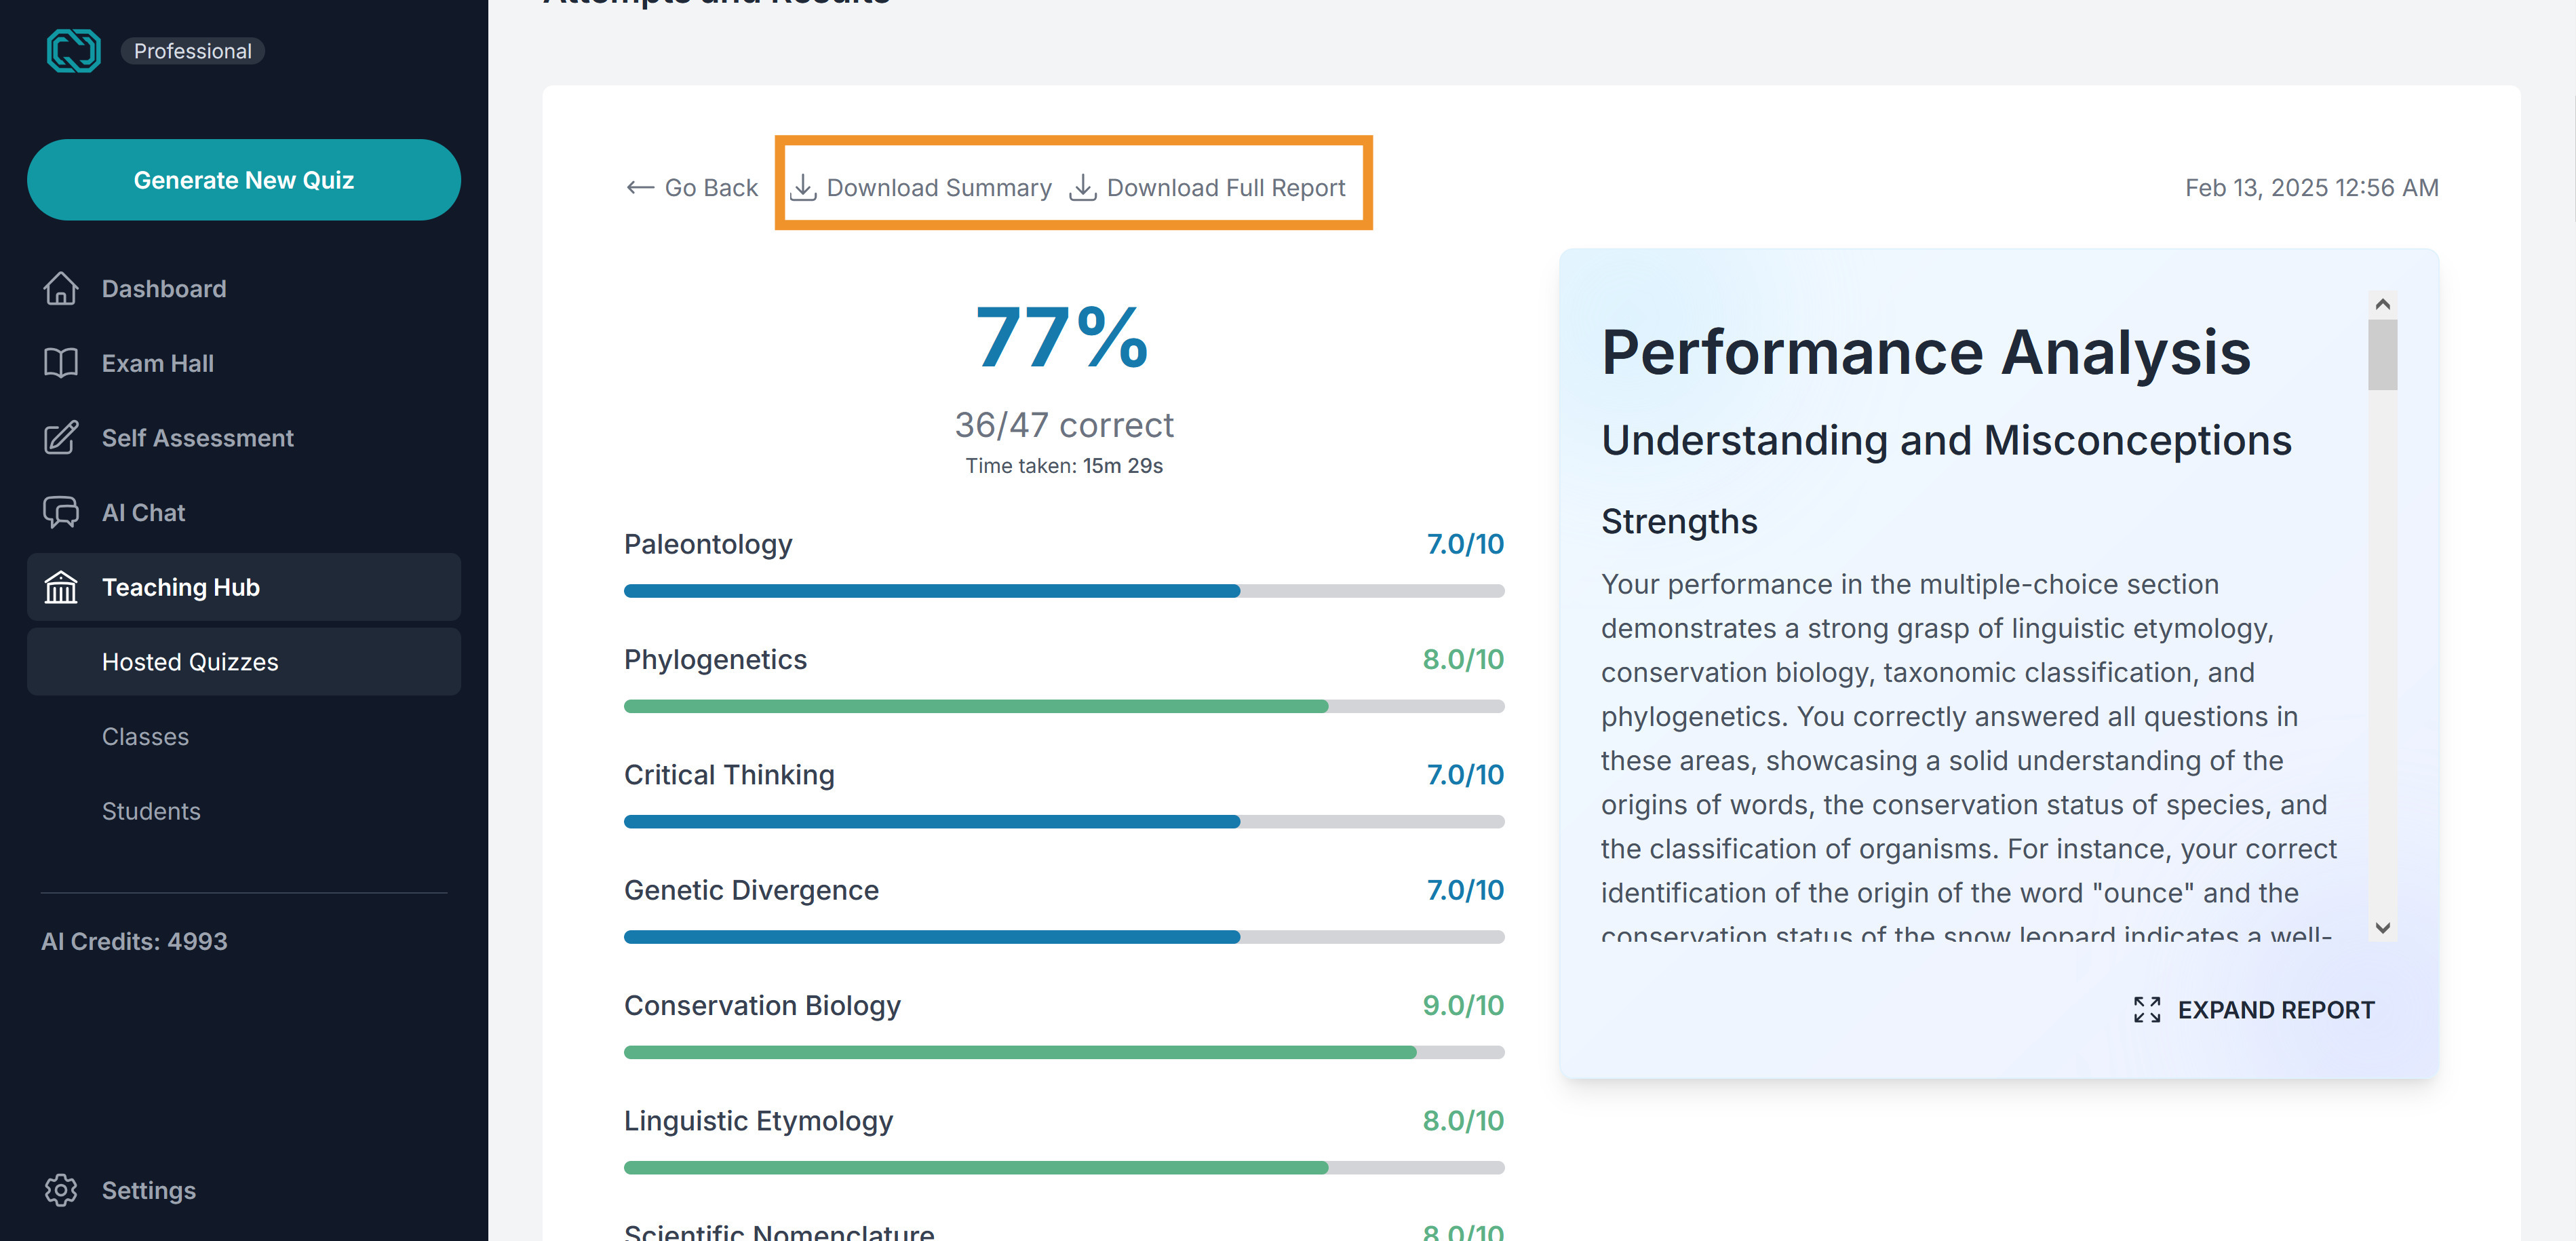
Options are available to download an individual student's report.
This was an overview of hosting, grading, and analyzing quiz results in QuizWhiz.
If you have any further questions, please contact support at admin@quizwhiz.ai.